Comfort Food: Chicken Potpies

9507

Growing up, store bought Banquet chicken potpies were almost always in the freezer, ready for a quick last minute dinner – I loved them, especially in winter, they’re great comfort food.  As with many of my childhood favorites, however, including pizza, egg rolls, and giant soft pretzels, I wanted to try my hand at making a great homemade version of my childhood favorite.

The first thing I learned, is that the definition of “potpie” is a bit slippery.  Most recipes have only a top crust, some traditional versions apparently have no crust – just a thick stew in a, wait for it … pot.   When I visited the Walnut Room at the downtown Chicago Marshall Field’s Department Store a few years back, I of course ordered their famous chicken potpie.  What I remember being served was a ramekin of chicken stew with a croissant set on top of it – not what I was expecting.  Maybe they ran out of pastry crust that day, or decided that puff pastry was ok to use instead of a flakey pastry crust – and where the heck was the bottom crust? – that was missing all together – this was not at all what I was expecting.   Maybe what I wanted was not a true potpie, but simply a better version of what Banquet was calling a potpie – off to the kitchen.

Or rather, to the cookbooks and Google.  Ida Baily’s cook book from 1932 would certainly have a good recipe … or not.  She had versions of meat pies with biscuits on top, meat turnovers – not the historic precedent that I was looking for.  Same for The Joy of Cooking.  Martha Stewart, certainly – well, she came close to what I was looking for, but she also had no bottom crust, and her filling was not what I was trying to achieve with my version.

Ok, so after making chicken and dumplings last year, I thought, “Hey, this could make a great potpie filling.”  And so it did, minus the dumplings.  Now for the crust.

I tried several recipes, some were too buttery – distracting.  An all lard crust was very flaky, but seemed kind of dry – good, but still lacking what I had in mind.  Maybe half butter, and half shortening? BINGO.  To my taste, both vegetable shortening (such as Crisco) and lard worked equally well with butter in the pastry recipe which follows.  I am not sure which is healthier, but, for me the taste is the same.  Ida Baily Allen, in her 1932 Cooking Menus Service cookbook, even mentions that half the total shortening could be cream cheese – hmmm.  I haven’t tried that in this recipe, but have used cream cheese in making pecan tassie dough, and it’s great, so why not?

The pie crust recipe that I went with actually came from the 2006 Marshall Field’s Cookbook (which I bought last year at an estate sale for $3) which included “Mrs. Hering’s Famous Chicken Potpie”.  The recipe is pretty much the same as any other pie crust recipe, except for the fact that it calls for ½ cup butter, and ¼ cup shortening .. and that is a very important and key difference.  I’ve also used Martha Stewart’s “basic pie dough” recipe and it works well if half the butter is substituted with lard or shortening.  Her recipe can be found here.

7123

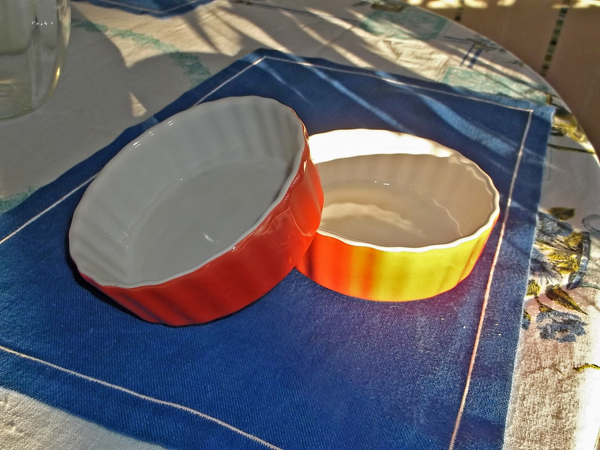
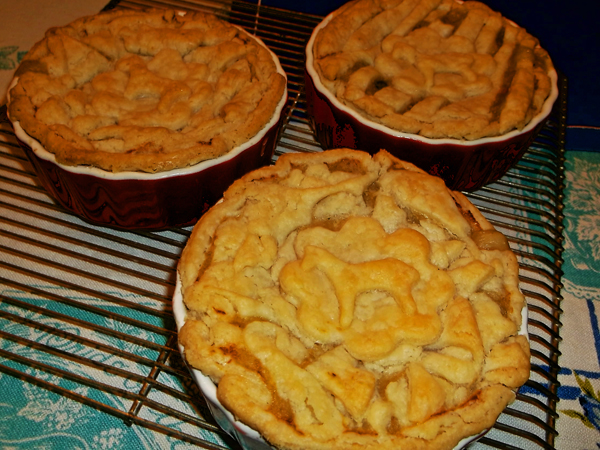
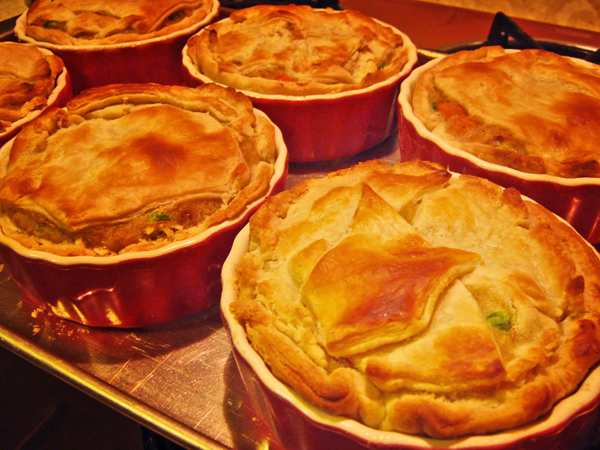
With Banquet pot pies as the model, I went in search of little four inch round aluminum pie plates.  Off to the dollar store.  While in the Dollar Tree store, I scanned a lot of disposable foil cookware – however, no mini pie plates, sadly.  Just as well though, since they did have ceramic ramekins for a dollar each. BINGO.  I bought nine.  At 4 ½ inches across and holding 8oz (one cup), they were perfect.

Day One

Admittedly, making homemade potpies is not as easy as opening the freezer, pulling out a pie, and baking – but that is why, when I do make them, I make a lot, and freeze most for future dinners.  What follows is the nuts and bolts of making my unique (as it turns out) version of chicken potpies.

Crust Recipe

  • 1 ½ cups all purpose flour
  • 1 ½ teaspoon salt
  • ½ cup of cubed butter, chilled
  • ¼ cup chilled shortening, lard, or cream cheese
  • 3 to 4 tablespoons of ice water

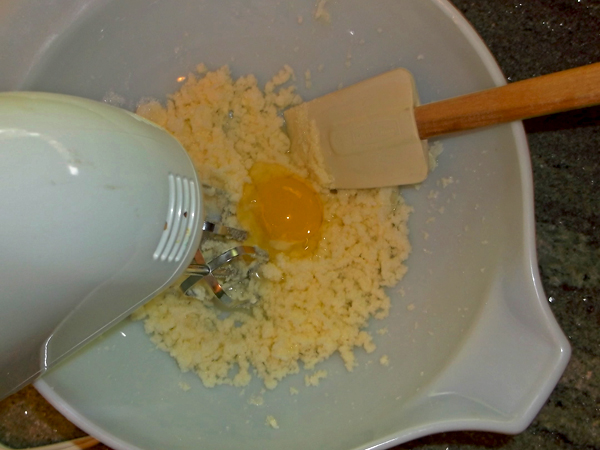
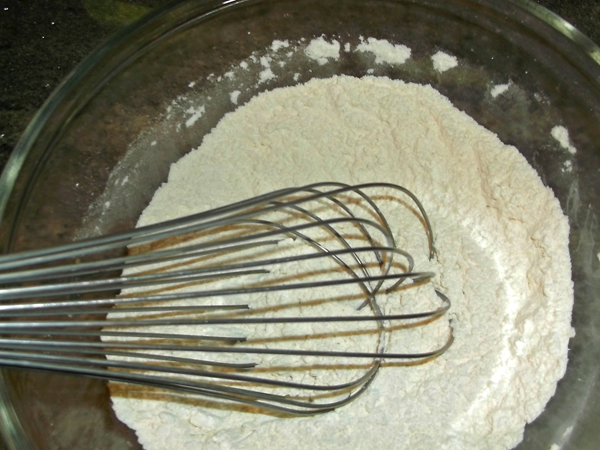
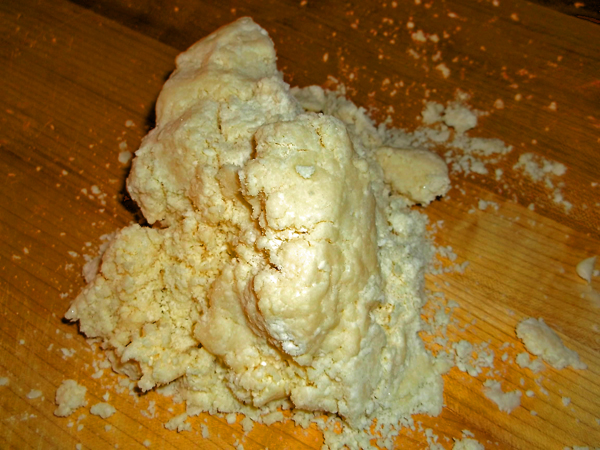
Add first four ingredients to the bowl of a food processor, pulse until mix is crumbly, add water slowly, one tablespoon at a time, pulsing three or four times after each addition.  The resulting mix will be a bit dry, as shown below:

6965

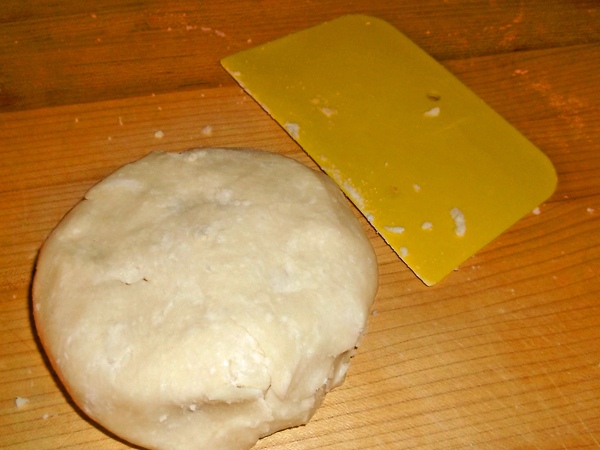
On a clean work surface, press the dough into a flattened round, and wrap in plastic wrap.  Refrigerate for at least one hour, or overnight.  One dough recipe makes three potpies using the ramekins described above.  I made 15 potpies last time so I needed 5 rounds of dough.

6966

Chicken Filling

For the filling of the potpies, I simply make a thickened chicken soup with lots of shredded chicken meat (dark or white meat) and the addition of a cup or so of frozen peas.

To make the stock you will need:

  • 1 large onion cut in half
  • 4 large carrots coarsely chopped
  • 4 stalks of celery coarsely chopped
  • 4 chicken thighs, with the addition of neck bones, back bones, and wing tips if you have them.
  • 1 tablespoon of whole black peppercorns
  • 8 cups of water
  • 4 chicken bouillon cubes or 2 tablespoons of chicken base
  • 3 bay leaves

Add all of the above ingredients to a large stock pot and simmer over low heat for three hours.  Remove the thigh meat (or breast meat) after one hour of cooking.  Keep the backbones, etc. in the stock for the full three hours.  After three hours, strain the stock, discarding the bones and vegetables. Cool the stock overnight in the refrigerator.  Remove any solidified fat the next day.

Day Two

Bring the strained stock to a simmer and add:

  • 5 peeled and diced carrots
  • 5 chopped stalks of celery
  • ½ cup fresh parsley
  • Shredded chicken meat from cooked thighs or breasts
  • 1 cup of fresh or frozen peas
  • Add salt and pepper to taste

Once the above ingredients have come to a simmer, you will need to make a roux to thicken the stock.  To do this, combine in a small pan:

  • 1 stick of butter (=½ cup)
  • 1 cup all-purpose flour

Stir mixture over medium high heat for 3 or 4 minutes until bubbling, add the roux to the stock and stir until stock is visibly thickened.   Depending on the amount of stock, you may need to slowly add the addition of a mixture of ½ cup of flour in 1 cup of cold water.  You may, or may not need the whole amount of flour/water mixture to bring the stock to the proper thickness. Set filling aside to cool slightly, or chill overnight.

6959

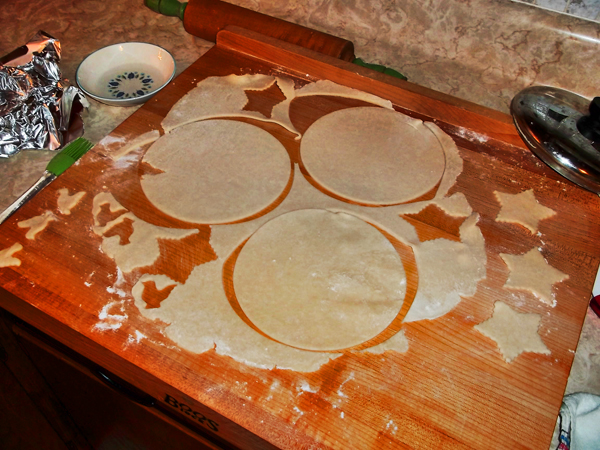
While the filling is cooling off a bit, roll out the chilled pastry dough to approximately 1/8 inch thick.  I just keep rolling out the dough until I can cut out three rounds using a pot lid which cuts out perfect 7 inch disks – the right size to make the bottom crusts in my 4½ inch ramekins. Cut up the remaining scraps for the top crust.  I sometimes cut out shapes with cookie cutters for added decoration.

6955

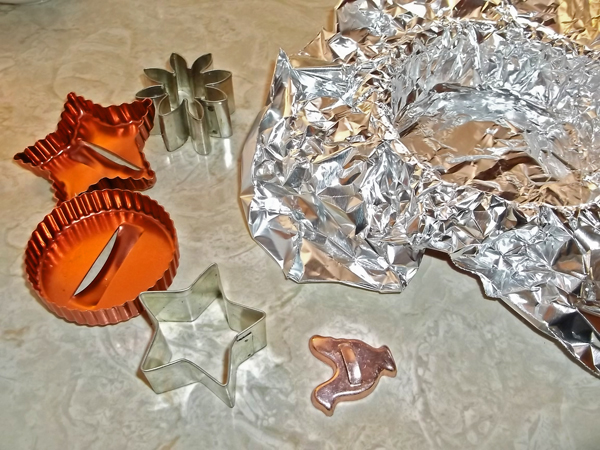
If you plan on freezing some of your potpies for later, line your ramekins with foil before laying in the bottom crust, allow enough foil to fold over the top of the pies when completed.  Remove each foil wrapped pie from the ramekin, place into individual freezer bags and freeze for later use.

6960

6961

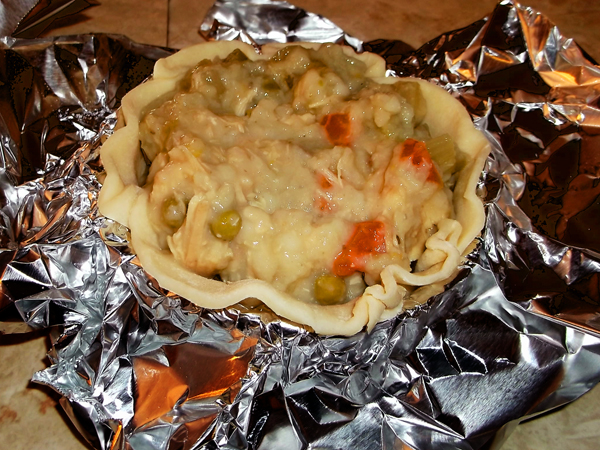
To save time, use a ½ cup ladle to fill the dough lined ramekins with the thick filling.

9505

6963

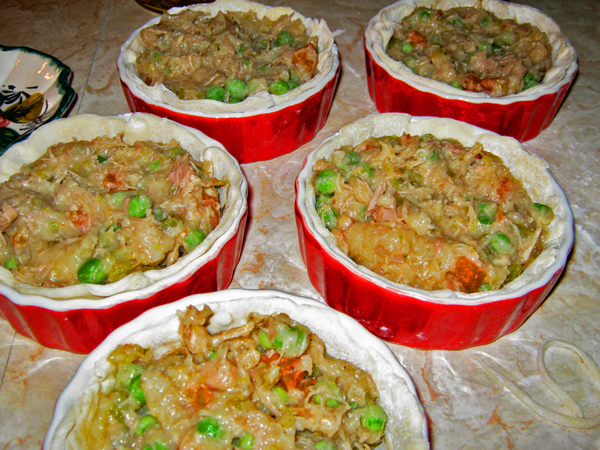
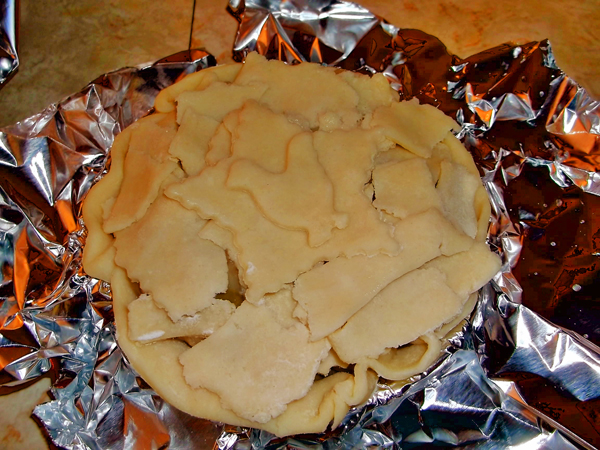
Then top the pies with the scraps of dough left after cutting out the bottom crust rounds.

6964

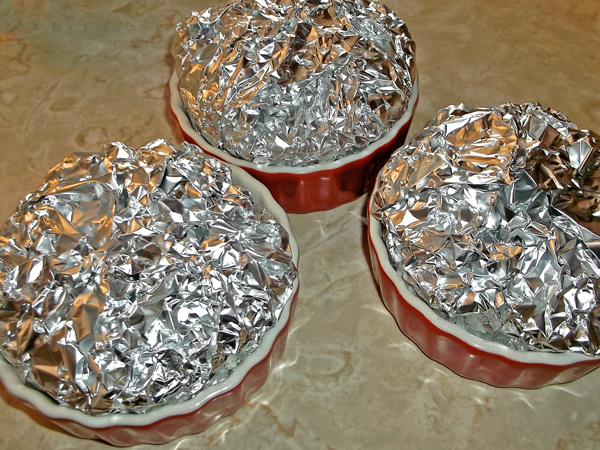
I partially freeze the foil wrapped potpies while still in the ramekins for one hour before removing them from the ramekins and placing the wrapped pies in individual freezer bags – this step helps them keep their shape while handling them without the support of the ceramic ramekins.

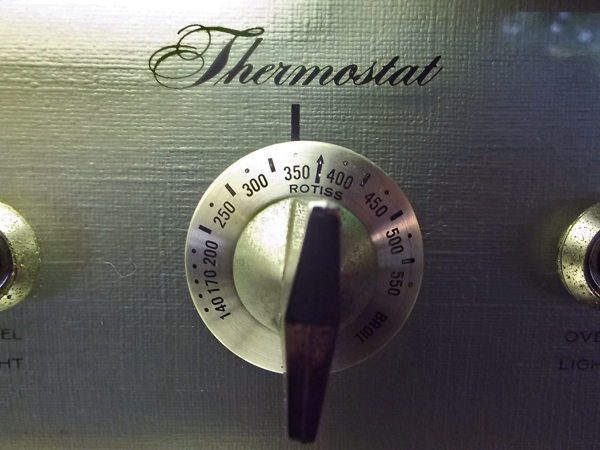
Of course, the pies that you are going to bake right away don’t need to have a foil liner, they can be baked at 375° F for 20 to 25 minutes or until golden and bubbly.  To bake the frozen pies, you can remove the foil and place the frozen pie in a ramekin to bake, or simply open up the foil, to reveal the top of the potpie and bake on a cookie sheet.  Either way, a cookie sheet under the potpies will collect any drips and make for easier clean up.

9506

The filling for these pot pies can be just about anything that you think might be good, including adding seafood, substituting beef stew for the chicken version, or going completely vegetarian and using what is available from your garden.  I may try a cream of asparagus version of this recipe this spring. Good luck, and I hope that you enjoy my version of chicken potpie as much as I do.

6969


Share Button

Have Plants Ready in Spring by Propagating Now in Fall

6290

Sowing Seeds

October and November are not only the months when we clean up our vegetable gardens and dig up our tender flowering bulbs, such as Canna, Tuberose, and Calla Lillies, but also when  we start planning for next season’s gardens and part of that planning involves planting seeds of perennials that have been collected over the past growing season and stored for fall planting. The photo above, shows the cache of seeds from some of my impromptu (as well as planned) seed collecting this season.  Included in the mix above is Prairie Phlox, Cream Baptisia, Lowbush Blueberry, Swamp White Oak, Hill’s Oak, Common Alumroot, Downy Gentian, and Junegrass.

For the most part, the seeds that I’ve collected are native to my area of the Midwest.  These seeds may have been collected from plants that are already growing in my yard, which were grown from seed collected in years previous.  Other seeds are from native plants that are not currently growing in my gardens, for these, I like to find a local, naturally occurring, seed source.  These sites are not always easy to find, they include railroad right-of-ways along roadsides, others are parcels of land in urban areas that were never developed, some are roadside ditches, others are woodlands.  During the growing season, I am always on the lookout for flowers and grasses that I can come back for later, to collect their seed.  Often, a large showy plant that catches my eye from the car, such as Prairie Dock, will be surrounded by other interesting plants, including Tall Green Milkweed (Asclepias hirtella), Leadplant (Amorpha canescens), or Prairie Phlox (Phlox pillosa) that can only be seen on foot – the locations are written down for later seed collection.  It always pays to check out these sites for uncommon plants, marked by common indicator plants such as Prairie Dock.

6292

Harvested Prairie Phlox seed heads still covered with the nylon stockings.

Some seed, such as Prairie Phlox will shoot its seed far and wide as it ripens.  To be able to collect the seed, I cover the pollinated flowers with nylon stockings tied at the base with string or a twist tie.  Finding a brown stocking in an open field, a month or two later, can be a challenge, I therefore also tie on a piece of plastic marking tape with a bright color, as shown above.  Often a rain will cause the enclosed seed head to lean down, making relocation a bigger challenge than might be expected.

6295I mark a few flowering phlox with pink tape that I haven’t encased in nylons – these, I use as indicators of seed ripeness.  Once I see that these indicator plants have released their seed, I go in a cut the stems of the plants with stockings a put them in a dry place until I am ready to extract the seeds.  The picture above, shows the small black seeds mixed in with the chaff – when planting the seed, I don’t bother removing the chaff – for my purposes, it makes no difference if it remains.
5914

My seed flats are made from 1″ by 4″ lumber, screwed together at the corners, with metal mesh (hardware cloth) stapled to the bottom.  While the picture above shows 1/4″ hardware cloth, 1/2″ openings are preferable when leaving the plants in the flats for more than one season.  Set on wood chip mulch, the larger openings allow plant roots to grow down into the mulch, when the flats are lifted, much of the root system which is down in the mulch will come up with the flat, the 1/2″ opening in the mesh allow the roots to pull through it when the plants are removed from the flats for planting.  Ideally, the plants would be removed from the flats as soon as they have their first true leaves, but sometimes the ideal does not happen, and the plants need to be left in the flats for a longer period.  I’ve left Pale Purple Coneflower (Echinacea pallida) in flats, in this way, for over a year – the mature plants, when pulled from the flats transplanted well, and even flowered that same year – where there were roots that broke off, those broken roots were planted and formed plants as well – bonus plants!

5927The seed flats are planted in fall, because many native plants need to go through cold moist conditions before they will sprout, some such as Pasture Rose (Rosa carolina) need two years before they will sprout, others, such as Little Bluestem Grass (Schizachyrium scoparium) do not need any cold treatment, and will sprout shortly after they are planted if temperatures are warm enough.  Plantsman Bill (William) Cullina explains the particular treatments very well for each species, in his book Growing and Propagating Wildflowers of the United States and Canada, published in 2000. 

Around October, when temperatures are still pleasant, I fill the seed flats with soil.  A loose mix is best.  This allows for good drainage, but also makes it easier to pull the plants out of the flats when it comes time for planting out in to the ground, or pots.  This year I mixed some sandy soil with my native silty soil.  In the past, I have used composted wood chips, and even peat moss to make a light soil to go in to the flats.

5928My homemade sifter with 1/2″ metal mesh was made to fit over my wheelbarrow.  The mesh is sandwiched between the wood frame and 1″ by 2″ wooden cleats.  Drywall screws were used to hold the cleats and the mesh to the wood frame of the sifter. One cleat goes across the center of the mesh to keep it from sagging too much.  I used what I had on hand, but using 1″by 8″ lumber, instead of 2 by 8’s, for the sides would make the box much lighter!

5930Before filling the flats with soil, lay down a few sheets of newspaper, this keeps the loose soil from falling through the mesh.  Once the soil is moistened, this won’t be a problem, and the newspaper breaks down by the following spring – no longer needed.

5932Once the flats are full of soil, lightly tamp the soil to make it level.  I use a tool called a “tile float” made for grouting ceramic floor tiles, but a short piece of 2×4 or even a brick will do the job.

6291Label the flats with the name of each species planted, and the date that they were planted.  I also write down the source of the seed.  Top dress each flat with a bit more sifted soil – no more than a half inch is needed, even less for dust like seeds.  Then tamp the soil again so the seed makes good contact with the soil.

6297Cover your flats with wire mesh to protect the seeds from squirrels, birds, and other curious animals.  I used empty seed flats to protect my seeds, but window screen material, weighted down with stones works fine, as well.  The screening will allow moisture and sun in and keep varmints out. 

With the rare exception, all of the native plants in my yard, including my oak trees, were grown in the way described above.  It’s easy, cost effective, and rewarding.  When spring arrives, you will have plenty of plants waiting for you to set out in the landscape.

6288

Rooting Cuttings

For some of my tender herbs, such as the Pineapple Sage (Salvia elegans) shown above, ornamentals, including showy begonias, and plants such as edible figs, I take cuttings at the end of the season and over winter them indoors. 

The Pineapple Sage, a native of Mexico, is a favorite of mine.  The scent of the leaves is amazing, and the red flowers, late in the season, are the most intense red I have ever seen – they seem to almost glow!  Of course, they can be purchased in spring at many garden centers (I bought my original plant from Ace Hardware), but growing the plant from cuttings in late summer (as late as October), to over winter in your home is so easy, it seems a shame not to.  Take enough cuttings to give, as plants, to gardening friends in the spring. 

To start, cut off a six inch (more or less) length of stem, just below a leaf node, from the mother plant in late summer (now thirty inches tall in your herb garden), remove the leaves from the lower three inches of the cutting and pinch off the tip growth, as shown above.  These can either be stuck right into a mix of 50:50 sand to soil, or perlite to soil or they can be dipped into a jar of rooting powder (rooting hormone, aka. plant growth regulator).  A light dusting is all that is needed.  In July, I took a cutting and stuck it right into some soil in a pot and the Pineapple Sage rooted, at the end of the season, the rooting powder may move things along more quickly.  Make sure to keep the cutting in bright light, but not direct sunlight, until rooting has occurred – about three to four weeks.

6300

6299  6301

6335

For the cutting I took in July, I simply put the pot in a shady spot outside and kept the soil moist, and the plant rooted just fine in less than a month (with no rooting powder).  For the cuttings taken in October, I brought the pot full of cuttings inside and set it in a saucer of water to moisten the soil, the next morning, I removed the pot from the  saucer of water, placed it near a east facing window, and loosely placed a stiff zip-lock bag over the pot of cuttings to help keep the humidity higher around the cutting than the dry ambient air.  The clay (unglazed terra cotta) also absorbs and gives off moisture, thereby aiding in keeping up the humidity inside the bag, unlike a plastic pot.  It is important to let in some fresh air, so do not seal the bag tightly around the pot of cuttings or they will be likely to rot, not root.  Remove the bag every few days to check the soil moisture and to remove any leaves that might have fallen on to the soil – they tend to get moldy if not removed.  Once the cuttings show new growth, in a few weeks, remove the plastic bag and water as needed.


Overwintering Figs and Ornamental Begonias

5471

Ripe figs ready to pick and eat fresh in August!

1111

Edible Fig tree in need of pruning.

5476

Part of the crop, ready to eat, or freeze.

5481As I clean up the garden in early fall, I like to take cuttings of some of my Ornamental Begonias, such as ‘Gryphon’ (shown at right in the photo below)- a newer cultivar that did so well for me this past summer, that I would like to have plants for next summer as well.  Other plants, such as my edible fig, were in need of a pruning – can these cuttings be rooted? No harm in trying!

5069As can be seen in the photo, both the ‘Gryphon’ (yes, that is the correct spelling) and an old fashioned “Hardy Begonia” got quite large this summer, too large, in fact, to bring indoors (sadly).  Taking cuttings is the only option, if I want the plants to continue in my garden next year.  The fig tree overwinters in my garage, it can take below freezing temperatures, into the 20’s, but must be protected if kept outside in the Midwest.  The crop of figs it produces is wonderful, some of the rooted cuttings will be planted in the ground next spring and overwintered in place with protection – stay tuned for that process next fall.

6677The photo above was taken in November, the begonia cutting were made as I pulled the mother plants from their pots a few weeks earlier.  The fig cutting, the “stick” in the photo above, was taken in August, the leaves immediately dried and fell off, leaving only the stem, failure, or so I thought.  Being a mixture of lazy and curious, I left the cutting in the glass of water for two more months, changing out the water once a week.  During that time, I could see the little white buds on the stem below the water, eventually they turned into roots.  Success! (so far)

6678Even though it was mid-November, it happened to be warm enough to work outside, so I brought the plants and a few pots out to my backyard pile of soil (handy to have).  I made sure that that pots had good drainage, then filled the pots with soil – with about a quarter of the soil consisting of perlite to maximize drainage and allow some air to get to the new roots.

6681

‘Gryphon’ Begonia cuttings held in water for a week, no roots yet.

6683

“Hardy Fig” cutting taken two months prior, in August, and kept in a glass of water – nice roots!

The potted cuttings were brought inside and set in front of an east facing window.  No tenting with a plastic bag is needed since the fig already had roots, and the begonias are prone to rot with too much moisture.  Next spring, the fig will be planted in the ground.  Next fall, four foot high metal fencing will be put around the fig, filled with fall leaves and wrapped in plastic until night temperatures rise above 20 degrees in Spring. 

The four begonia cuttings will be separated in the spring and planted in pots large enough to allow the begonias to grow as huge as the mother plant did this past season.  All of these plants will be checked once a week over the winter and watered when the soil is dry to the touch.

6687


Share Button

Serviceberry Coffee Cake


READY TO EAT 1096 ed2


For the first time since it was planted five years ago, my Serviceberry (Amelanchier x grandiflora) in the garden was laden with small, maroon colored, blueberry-like fruit.  I thought “Wow, I’m gonna have a lot of berries to snack on this year”, alas, the robins and squirrels thought the same (Cedar Waxwings are also fond of the fruit), and were well on their way to clearing the fruit from this small tree.  I decided that if I had any hope of having some for my dinner table, I would need to pick them two or three days before they became fully ripe. The bowl of serviceberries below, shows the color when they were picked.  They are quite tasty even at this stage, but I let them sit at room temperature to more fully ripen to a blue-black color, like the fruit seen in the photo above, along side of the Serviceberry Coffee Cake.


fruit 0791

The cake is very tasty and quick and easy to make.  It is a nice seasonal treat with a side of ice cream and a cup of coffee.  To make your own, I’ve included the recipe below.  Click on the slideshow to see the process, step by step.


Serviceberry Coffee Cake

Based on Blueberry Brunch Cake found in “Noteworthy, A Collection of Recipes from the Ravinia Festival”, NOTEWORTHY Publications, 1986

4    tablespoons butter (softened)

¾   cup sugar

1    egg

2    cups flour

2    teaspoons baking powder

½   teaspoon salt

½   cup milk

2    cups serviceberries

Topping

¼     cup sugar

¼     cup brown sugar

¼     teaspoon cinnamon

¼     teaspoon nutmeg

4      tablespoons butter (chilled)

½     cup English walnuts (coarsely chopped)

Preheat oven to 350°

Cream together butter and sugar. Beat in egg. In separate bowl, sift (wisk) together flour, baking powder, and salt. Add dry mixture to creamed mixture alternately with milk. Fold serviceberries into stiff batter.  Pour batter into greased and floured 8-inch square pan.  Use spatula to even out batter.

Combine sugar, flour, and cinnamon.  Add butter into mixture, cut into small pieces.  Blend by pinching together mixture with fingers until coarse crumbs are formed.  Sprinkle crumb mixture over batter in pan, then top with chopped walnuts.  Bake in 350° oven for 45 minutes.  Let cake cool in pan for 20 minutes before removing cake from pan.  Note, batter will rise by double as it bakes.  Very good with a garnish of fresh fruit and vanilla ice cream.

2011 Apr

Spring blooms

2011 oct

Fall color

Share Button