Out in the Yard in November – Beautiful

6785

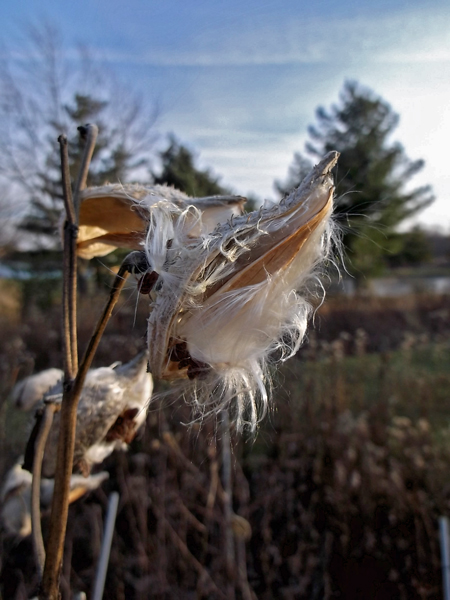
Milkweed pods catch the rays of a setting sun in my backyard meadow.

“If you’ve got just lawn grass, you’ve got nothing,” said Mace Vaughan of the Xerces Society, a leading organization in insect conservation. But as soon as you create a front yard wildflower meadow you go from an occasional honeybee to a lawn that might be full of 20 or 30 species of bees and butterflies and monarchs.”  New York Times, Jim Robbins, 22 November 2013

When I first moved into my home in the fall of 2005, I was excited about having a big yard, but the yard, as it was, was all mowed lawn – not very exciting at all.  When I read the article, The Year the Monarch Didn’t Appear, by Jim Robbins last week, about the decline in Monarch butterfly populations, it made me think of my yard, both how it was, barren, and how, when I look out my windows now,  I see variety and life, activity, beauty, nature.

The Front Yard

3842

My home, in the winter of 2006, shortly after I moved in.

My housewarming present from my father was a small seedling oak that he had dug from his yard, my first planting in my yard.   And so it began.  During the first spring in my home, I started marking out planting beds, laid out my vegetable garden, and planted more seedling oaks and other trees native to my region.  All the trees were started from seed collected on, or adjacent to, my parent’s property, a remnant of second growth oak woods.

6874

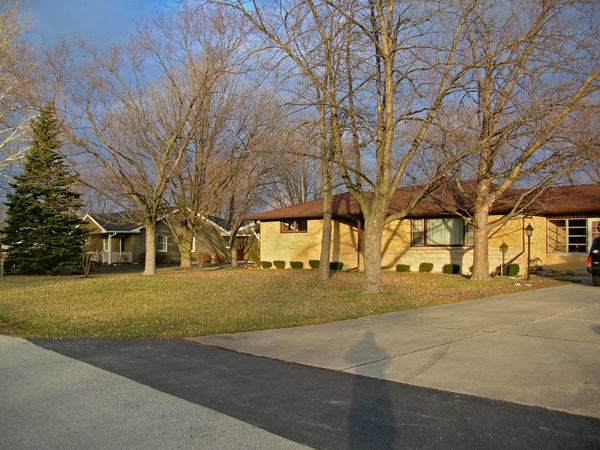
Today, the fall of 2013

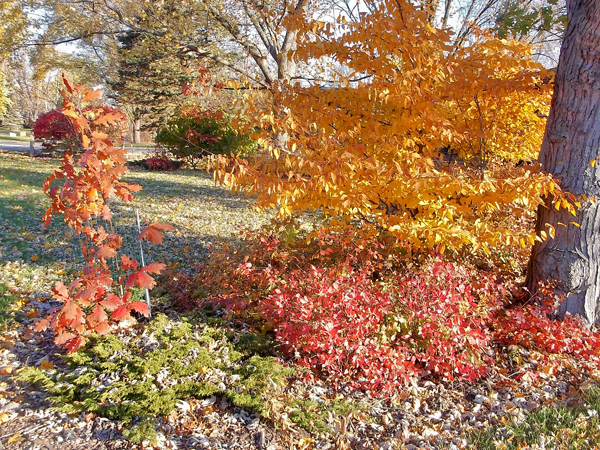
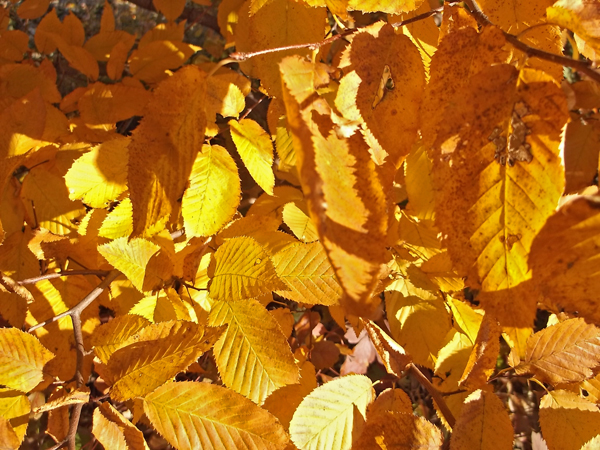
Those small trees grew fast – I was really amazed.  After a few years of putting roots deep into the ground, they started growing at two to three feet a year.  The American Hophornbeams, shown below with their leaves still intact, were only thirty inches tall three years ago.  When I look at photos from past years, I am amazed at how short a time is needed to transform a yard from a sterile no-man’s-land, to something that makes one breathe deep in awe – a landscape full of beauty and wonder.  A classroom, a sacred place.

6902

6906

A young Red Oak (Quercus rubra), in the foreground, will take over as the short lived Silver Maples decline.

3841

January of 2006

6871

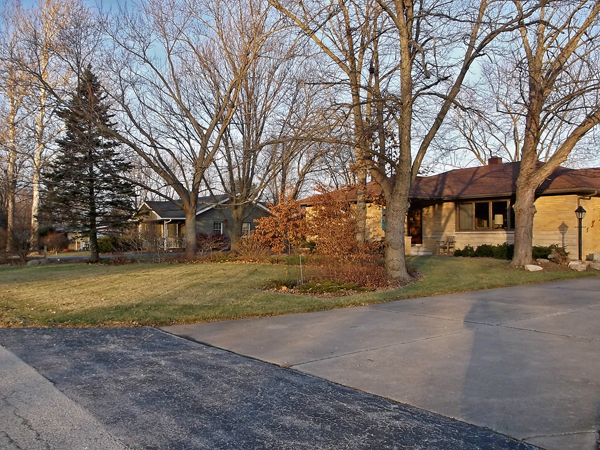
Today, November of 2013

The narrow strip of land between my driveway and my neighbor’s driveway receives plenty of sun, why mow grass when our native prairie grasses and flowers are so incredibly beautiful and would do so well in this location?  This garden has evolved quickly from a prairie flower garden with Black-eyed Susans, Pale Purple Coneflowers, Prairie Dock, Orange Milkweed, and Prairie Dropseed, to a more mature garden of mostly Midwest native grasses and trees, including Winged Sumac, Red Oak, and Hawthorn.  Prairie Dropseed grass (Sporobolis heterolepis) and a young Hawthorn (Crataegus sp.) can be seen in the above photo, with a ‘Twilite Prairie Blues’ Prairie Indigo just behind.  The larger scale of these plants works well for this open space.

The Back Yard

3844

Shortly after I moved in, January 2006. The one foot tall caged oak (a gift from my father) to the right of the clothesline was my first planting.

“Around the world people have replaced diverse natural habitat with the biological deserts that are roads, parking lots and bluegrass lawns. Meanwhile, the plants people choose for their yards are appealing for showy colors or shapes, not for their ecological role. Studies show that native oak trees in the mid-Atlantic states host as many as 537 species of caterpillars, which are important food for birds and other insects. Willows come in second with 456 species. Ginkgo, on the other hand, which is not native, supports three species, and zelkova, an exotic plant used to replace elm trees that died from disease, supports none. So the shelves are nearly bare for bugs and birds.”  New York Times, Jim Robbins, 22 November 2013

6908

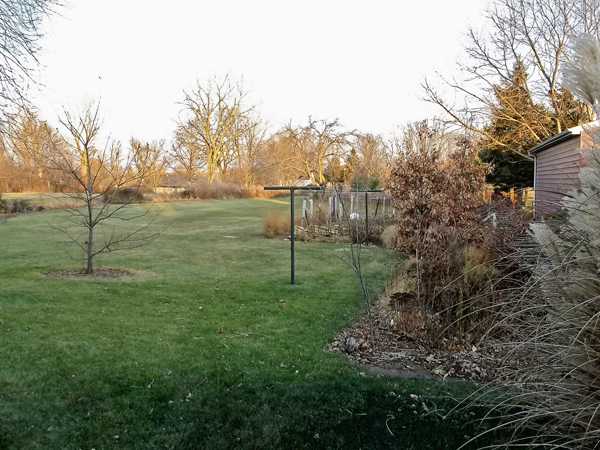
That little oak is now over ten feet tall and it has the company of over thirty other young oaks.

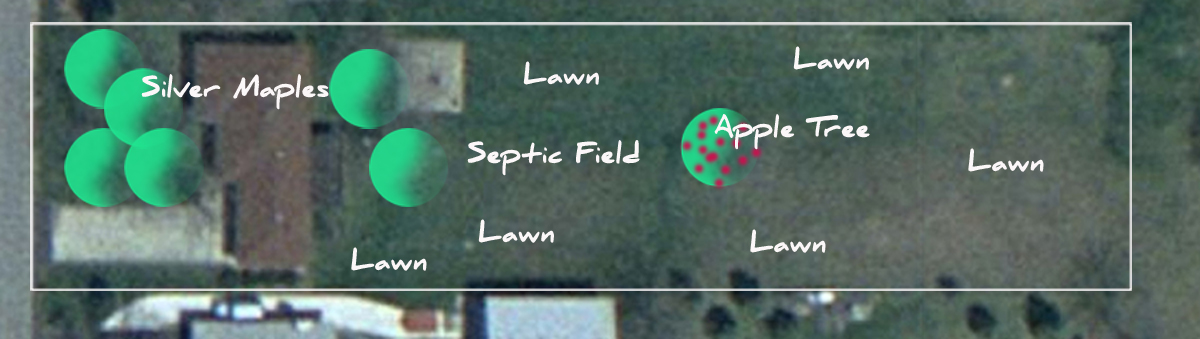
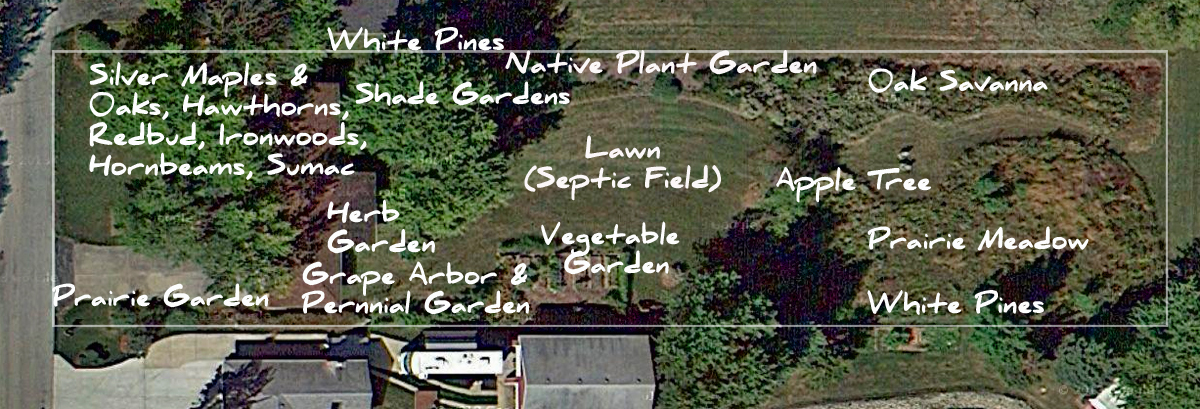
I do still have plenty of turf grass, too much, some of my friends tell me, some of it is aesthetics, as a landscape architect, I like long views, and some of the turf is practical, including the area around the clothesline and over the septic field.  But the aerial photos, shown below, hopefully help show how greatly the yard has changed over the past few years.  Now its a joy to take a stroll through the gardens and explore the changes year to year, even day to day.

My Yard in March of 2006:

cr 2006 Mar w Labels

My Yard in September of 2013:

2013 summer w labels

6761

Old Chicago street pavers stacked as sculpture until they are needed in the garden for another purpose.

Found objects play a big role in the design process.  The granite street pavers were salvaged by me after they were removed from an abandoned roadbed in Chicago.  Knowing their history, what street they came from, makes them even more interesting as repurposed objects in the landscape.

6894

More granite pavers waiting to be artfully stacked

6869

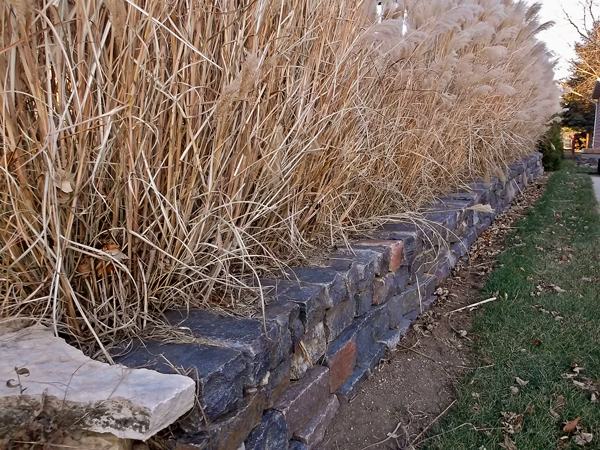
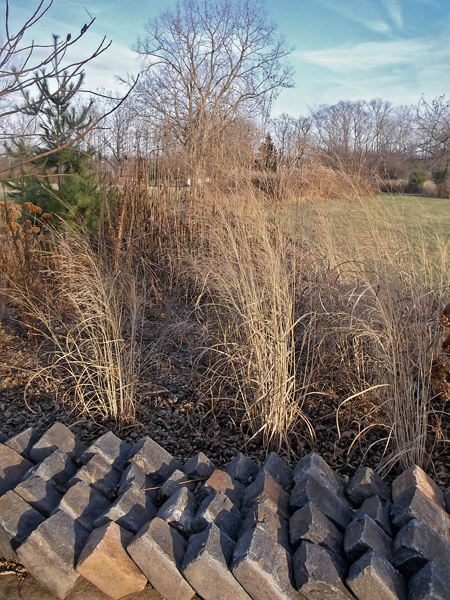
Some of the 100 year old granite pavers were used to create a retaining wall. The Maindengrass (Miscanthus sp.) while not native, creates an effective living screen.

6866

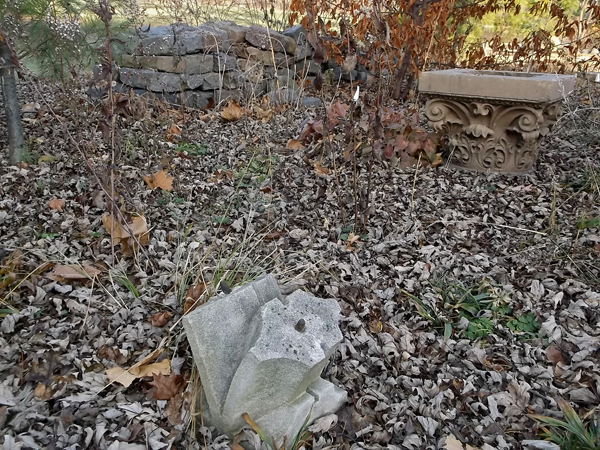
A trilobite fossil was found in a piece of salvaged limestone while building a low retaining wall.

6864

The remaining granite pavers may be used to replace the badly settled walkway along the garage.

6888

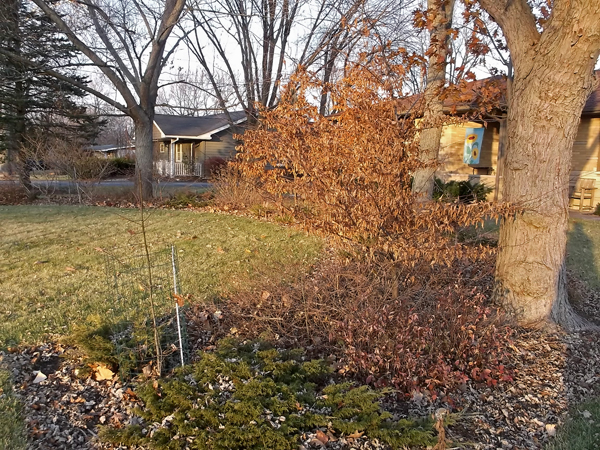
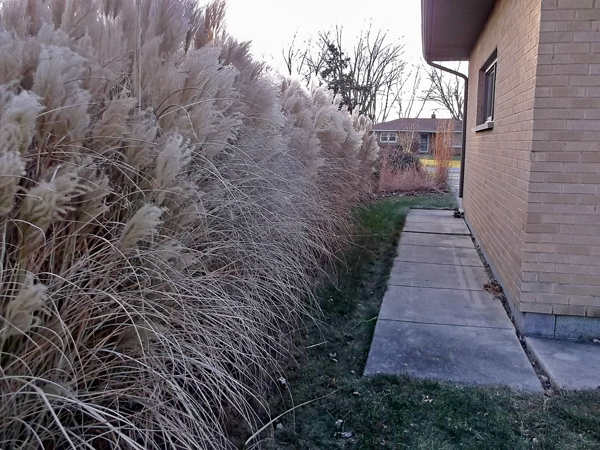
It’s not hard to tell where my property stops.  Eight years ago both sides of the photo looked the same.

6750

Salvaged building materials can make for interesting garden art.

6826

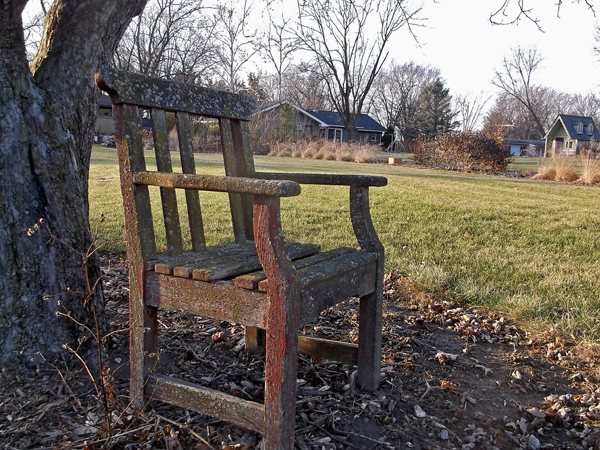
This garden chair was found in a creek bed, now it’s sculpture under the branches of the old apple tree.

6853

Other found objects were assembled to create a steampunk effect in the garden

6896

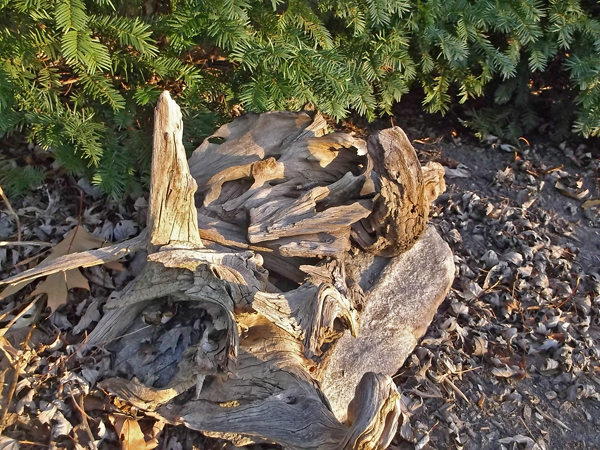
Stacked bits of driftwood show the passing of time.

6898

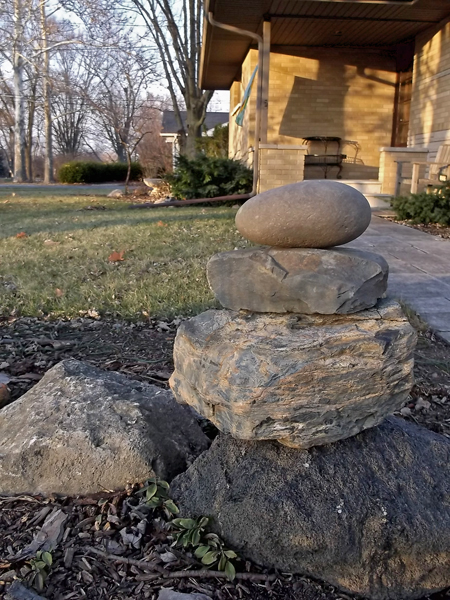
Rocks are my favorite form of sculpture, stacked, they show a human presence, evoking ancient rituals.

6770

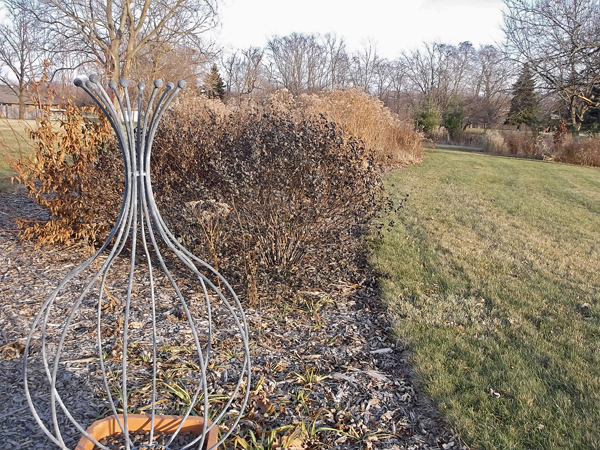
Souvenirs from vacations do not have to be T-shirts and ceramic mugs, this Deborah Silver sculpture reminds me of my visit with her at her Detroit Garden Works.

6852

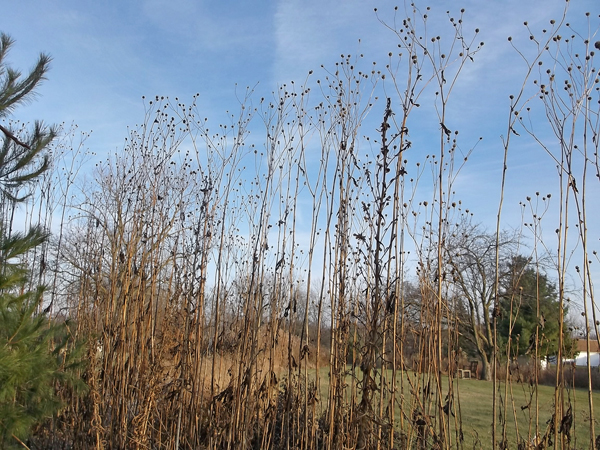
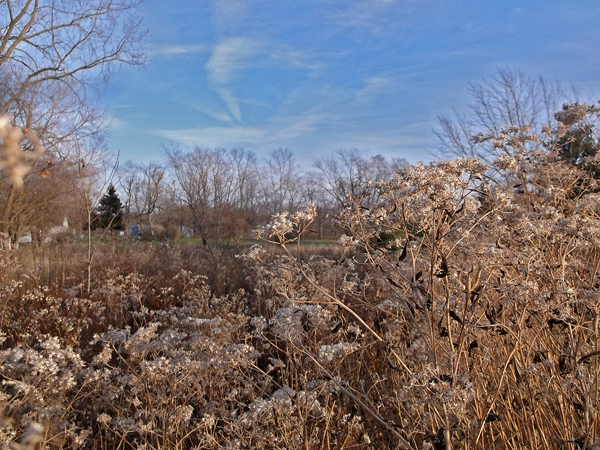
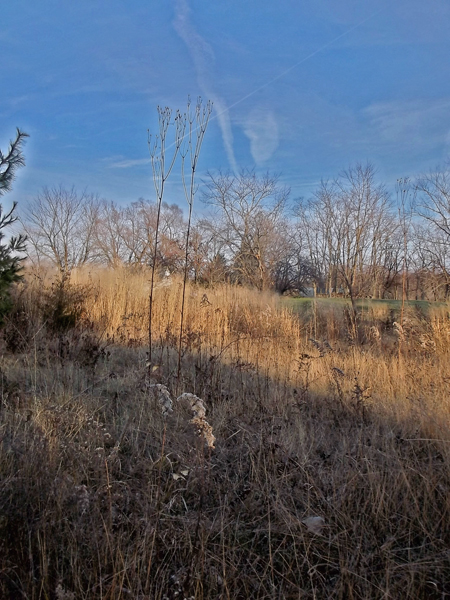
Silhouettes on the winter sky.

6768

6840

6835

6794

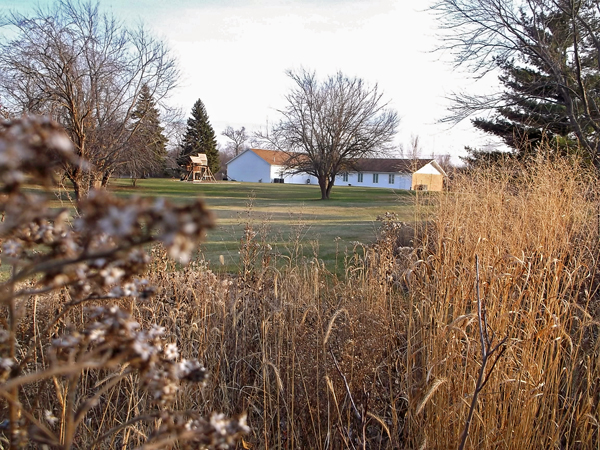
Mowed lawn for fifty years, now a prairie meadow, mowed once a year in March.

6783

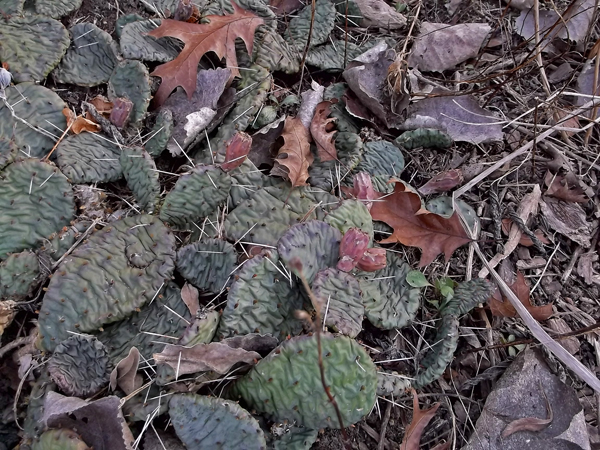
One of Illinois’ native Opuntia cactus showing this season’s fruit, “prickly pear”

6775

6790

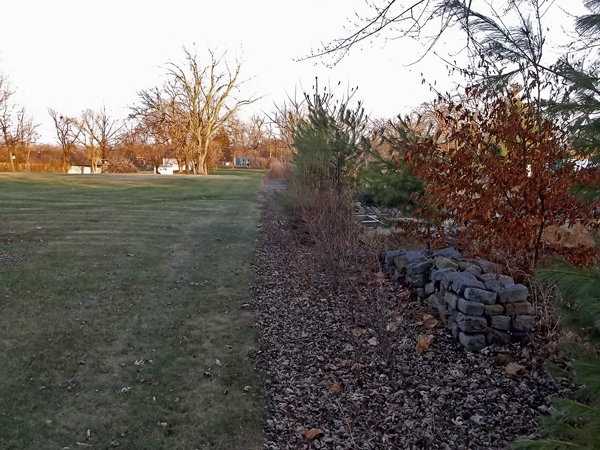
Standing in an oasis, I see the desert beyond

6791

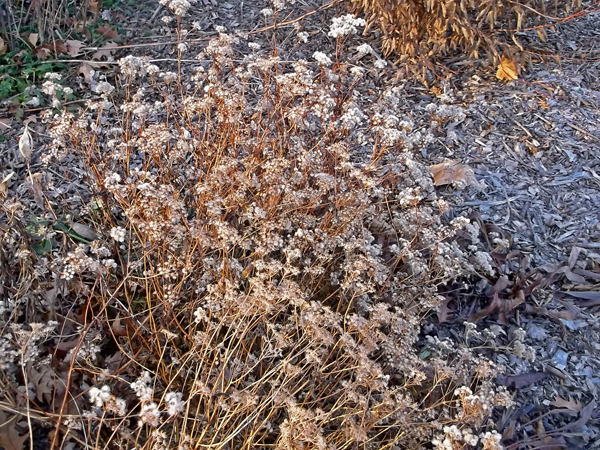
The remnants of Stiff Goldenrod seedheads – the flowers may be gone, but the beauty has not.

6823

6821

Little six foot oak, grew two feet this season. Reach for the sky mighty oak.

6809

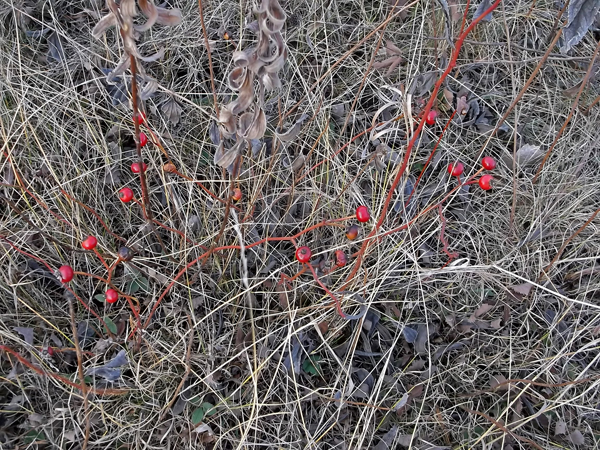
Pasture rose shows off its seasonal decorations

6818

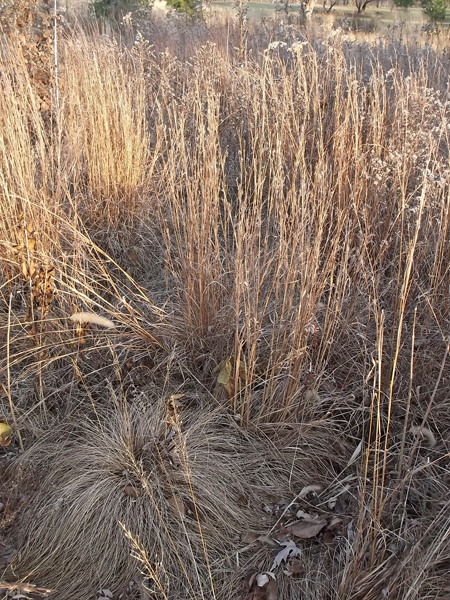
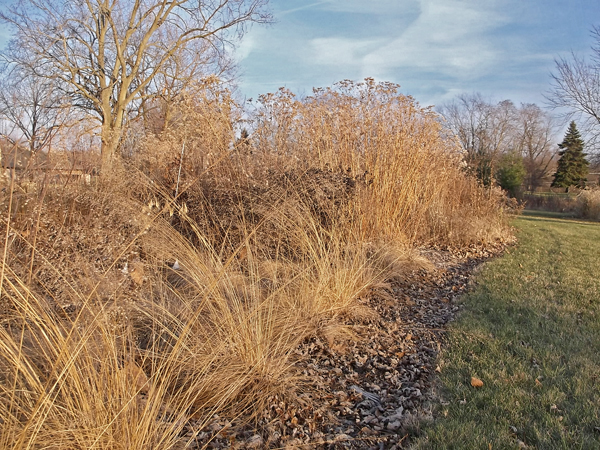
Mounded Prairie Dropseed grass surrounded by taller Little Bluestem grass in my backyard meadow

6800

Poverty Oats grass, how beautiful you are.

6775

6808

6771

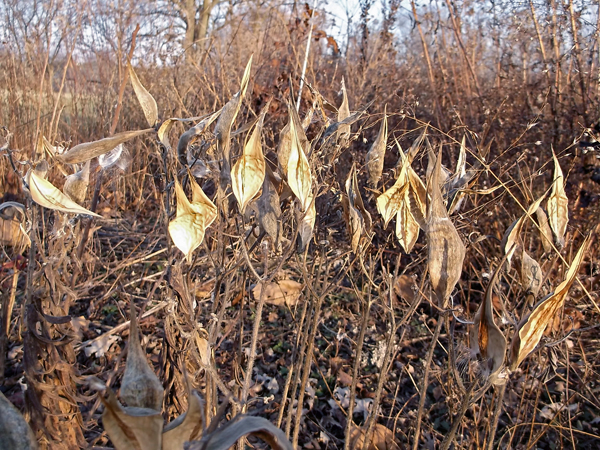
Orange Milkweed pods spreading seeds and giving hope to future Monarch visitors

6753

Solomon Seal fruits, understated beauty

6745

Mountain Mint, seed heads

6876

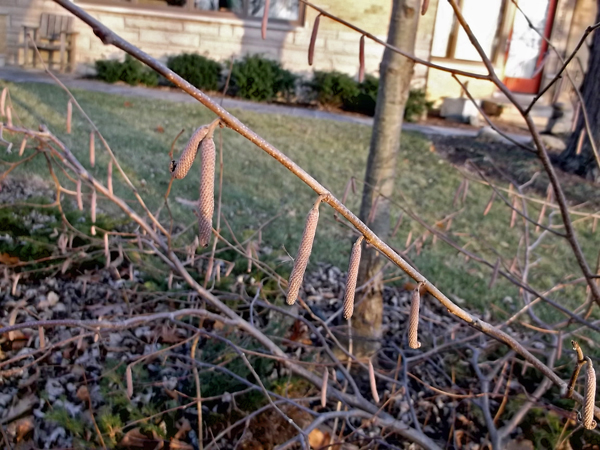
American Hazelnut catkins in November, ready for a warm spring day to release their pollen.

6854

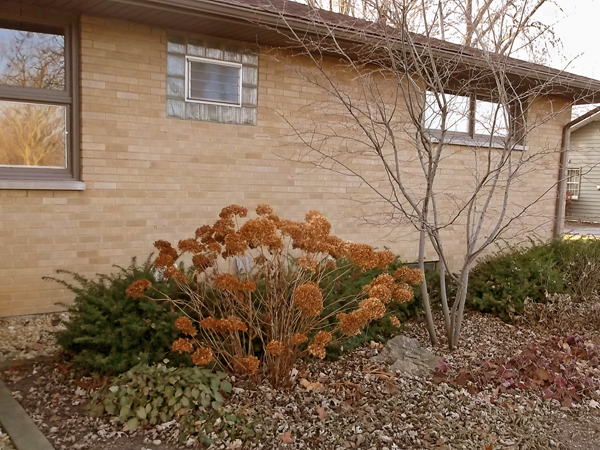
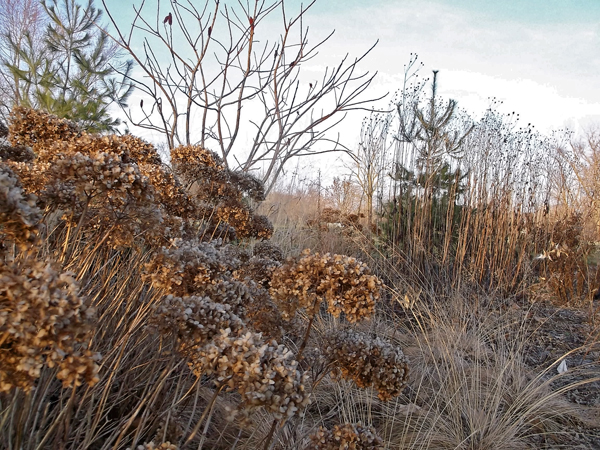
‘Annabelle’ Hydrangea, with Serviceberry trees, combine well with a few non-native evergreens including the groundcover Epimedium and Japanese yew shrubs .. makes a nice winter garden composition.


Share Button

Have Plants Ready in Spring by Propagating Now in Fall

6290

Sowing Seeds

October and November are not only the months when we clean up our vegetable gardens and dig up our tender flowering bulbs, such as Canna, Tuberose, and Calla Lillies, but also when  we start planning for next season’s gardens and part of that planning involves planting seeds of perennials that have been collected over the past growing season and stored for fall planting. The photo above, shows the cache of seeds from some of my impromptu (as well as planned) seed collecting this season.  Included in the mix above is Prairie Phlox, Cream Baptisia, Lowbush Blueberry, Swamp White Oak, Hill’s Oak, Common Alumroot, Downy Gentian, and Junegrass.

For the most part, the seeds that I’ve collected are native to my area of the Midwest.  These seeds may have been collected from plants that are already growing in my yard, which were grown from seed collected in years previous.  Other seeds are from native plants that are not currently growing in my gardens, for these, I like to find a local, naturally occurring, seed source.  These sites are not always easy to find, they include railroad right-of-ways along roadsides, others are parcels of land in urban areas that were never developed, some are roadside ditches, others are woodlands.  During the growing season, I am always on the lookout for flowers and grasses that I can come back for later, to collect their seed.  Often, a large showy plant that catches my eye from the car, such as Prairie Dock, will be surrounded by other interesting plants, including Tall Green Milkweed (Asclepias hirtella), Leadplant (Amorpha canescens), or Prairie Phlox (Phlox pillosa) that can only be seen on foot – the locations are written down for later seed collection.  It always pays to check out these sites for uncommon plants, marked by common indicator plants such as Prairie Dock.

6292

Harvested Prairie Phlox seed heads still covered with the nylon stockings.

Some seed, such as Prairie Phlox will shoot its seed far and wide as it ripens.  To be able to collect the seed, I cover the pollinated flowers with nylon stockings tied at the base with string or a twist tie.  Finding a brown stocking in an open field, a month or two later, can be a challenge, I therefore also tie on a piece of plastic marking tape with a bright color, as shown above.  Often a rain will cause the enclosed seed head to lean down, making relocation a bigger challenge than might be expected.

6295I mark a few flowering phlox with pink tape that I haven’t encased in nylons – these, I use as indicators of seed ripeness.  Once I see that these indicator plants have released their seed, I go in a cut the stems of the plants with stockings a put them in a dry place until I am ready to extract the seeds.  The picture above, shows the small black seeds mixed in with the chaff – when planting the seed, I don’t bother removing the chaff – for my purposes, it makes no difference if it remains.
5914

My seed flats are made from 1″ by 4″ lumber, screwed together at the corners, with metal mesh (hardware cloth) stapled to the bottom.  While the picture above shows 1/4″ hardware cloth, 1/2″ openings are preferable when leaving the plants in the flats for more than one season.  Set on wood chip mulch, the larger openings allow plant roots to grow down into the mulch, when the flats are lifted, much of the root system which is down in the mulch will come up with the flat, the 1/2″ opening in the mesh allow the roots to pull through it when the plants are removed from the flats for planting.  Ideally, the plants would be removed from the flats as soon as they have their first true leaves, but sometimes the ideal does not happen, and the plants need to be left in the flats for a longer period.  I’ve left Pale Purple Coneflower (Echinacea pallida) in flats, in this way, for over a year – the mature plants, when pulled from the flats transplanted well, and even flowered that same year – where there were roots that broke off, those broken roots were planted and formed plants as well – bonus plants!

5927The seed flats are planted in fall, because many native plants need to go through cold moist conditions before they will sprout, some such as Pasture Rose (Rosa carolina) need two years before they will sprout, others, such as Little Bluestem Grass (Schizachyrium scoparium) do not need any cold treatment, and will sprout shortly after they are planted if temperatures are warm enough.  Plantsman Bill (William) Cullina explains the particular treatments very well for each species, in his book Growing and Propagating Wildflowers of the United States and Canada, published in 2000. 

Around October, when temperatures are still pleasant, I fill the seed flats with soil.  A loose mix is best.  This allows for good drainage, but also makes it easier to pull the plants out of the flats when it comes time for planting out in to the ground, or pots.  This year I mixed some sandy soil with my native silty soil.  In the past, I have used composted wood chips, and even peat moss to make a light soil to go in to the flats.

5928My homemade sifter with 1/2″ metal mesh was made to fit over my wheelbarrow.  The mesh is sandwiched between the wood frame and 1″ by 2″ wooden cleats.  Drywall screws were used to hold the cleats and the mesh to the wood frame of the sifter. One cleat goes across the center of the mesh to keep it from sagging too much.  I used what I had on hand, but using 1″by 8″ lumber, instead of 2 by 8’s, for the sides would make the box much lighter!

5930Before filling the flats with soil, lay down a few sheets of newspaper, this keeps the loose soil from falling through the mesh.  Once the soil is moistened, this won’t be a problem, and the newspaper breaks down by the following spring – no longer needed.

5932Once the flats are full of soil, lightly tamp the soil to make it level.  I use a tool called a “tile float” made for grouting ceramic floor tiles, but a short piece of 2×4 or even a brick will do the job.

6291Label the flats with the name of each species planted, and the date that they were planted.  I also write down the source of the seed.  Top dress each flat with a bit more sifted soil – no more than a half inch is needed, even less for dust like seeds.  Then tamp the soil again so the seed makes good contact with the soil.

6297Cover your flats with wire mesh to protect the seeds from squirrels, birds, and other curious animals.  I used empty seed flats to protect my seeds, but window screen material, weighted down with stones works fine, as well.  The screening will allow moisture and sun in and keep varmints out. 

With the rare exception, all of the native plants in my yard, including my oak trees, were grown in the way described above.  It’s easy, cost effective, and rewarding.  When spring arrives, you will have plenty of plants waiting for you to set out in the landscape.

6288

Rooting Cuttings

For some of my tender herbs, such as the Pineapple Sage (Salvia elegans) shown above, ornamentals, including showy begonias, and plants such as edible figs, I take cuttings at the end of the season and over winter them indoors. 

The Pineapple Sage, a native of Mexico, is a favorite of mine.  The scent of the leaves is amazing, and the red flowers, late in the season, are the most intense red I have ever seen – they seem to almost glow!  Of course, they can be purchased in spring at many garden centers (I bought my original plant from Ace Hardware), but growing the plant from cuttings in late summer (as late as October), to over winter in your home is so easy, it seems a shame not to.  Take enough cuttings to give, as plants, to gardening friends in the spring. 

To start, cut off a six inch (more or less) length of stem, just below a leaf node, from the mother plant in late summer (now thirty inches tall in your herb garden), remove the leaves from the lower three inches of the cutting and pinch off the tip growth, as shown above.  These can either be stuck right into a mix of 50:50 sand to soil, or perlite to soil or they can be dipped into a jar of rooting powder (rooting hormone, aka. plant growth regulator).  A light dusting is all that is needed.  In July, I took a cutting and stuck it right into some soil in a pot and the Pineapple Sage rooted, at the end of the season, the rooting powder may move things along more quickly.  Make sure to keep the cutting in bright light, but not direct sunlight, until rooting has occurred – about three to four weeks.

6300

6299  6301

6335

For the cutting I took in July, I simply put the pot in a shady spot outside and kept the soil moist, and the plant rooted just fine in less than a month (with no rooting powder).  For the cuttings taken in October, I brought the pot full of cuttings inside and set it in a saucer of water to moisten the soil, the next morning, I removed the pot from the  saucer of water, placed it near a east facing window, and loosely placed a stiff zip-lock bag over the pot of cuttings to help keep the humidity higher around the cutting than the dry ambient air.  The clay (unglazed terra cotta) also absorbs and gives off moisture, thereby aiding in keeping up the humidity inside the bag, unlike a plastic pot.  It is important to let in some fresh air, so do not seal the bag tightly around the pot of cuttings or they will be likely to rot, not root.  Remove the bag every few days to check the soil moisture and to remove any leaves that might have fallen on to the soil – they tend to get moldy if not removed.  Once the cuttings show new growth, in a few weeks, remove the plastic bag and water as needed.


Overwintering Figs and Ornamental Begonias

5471

Ripe figs ready to pick and eat fresh in August!

1111

Edible Fig tree in need of pruning.

5476

Part of the crop, ready to eat, or freeze.

5481As I clean up the garden in early fall, I like to take cuttings of some of my Ornamental Begonias, such as ‘Gryphon’ (shown at right in the photo below)- a newer cultivar that did so well for me this past summer, that I would like to have plants for next summer as well.  Other plants, such as my edible fig, were in need of a pruning – can these cuttings be rooted? No harm in trying!

5069As can be seen in the photo, both the ‘Gryphon’ (yes, that is the correct spelling) and an old fashioned “Hardy Begonia” got quite large this summer, too large, in fact, to bring indoors (sadly).  Taking cuttings is the only option, if I want the plants to continue in my garden next year.  The fig tree overwinters in my garage, it can take below freezing temperatures, into the 20’s, but must be protected if kept outside in the Midwest.  The crop of figs it produces is wonderful, some of the rooted cuttings will be planted in the ground next spring and overwintered in place with protection – stay tuned for that process next fall.

6677The photo above was taken in November, the begonia cutting were made as I pulled the mother plants from their pots a few weeks earlier.  The fig cutting, the “stick” in the photo above, was taken in August, the leaves immediately dried and fell off, leaving only the stem, failure, or so I thought.  Being a mixture of lazy and curious, I left the cutting in the glass of water for two more months, changing out the water once a week.  During that time, I could see the little white buds on the stem below the water, eventually they turned into roots.  Success! (so far)

6678Even though it was mid-November, it happened to be warm enough to work outside, so I brought the plants and a few pots out to my backyard pile of soil (handy to have).  I made sure that that pots had good drainage, then filled the pots with soil – with about a quarter of the soil consisting of perlite to maximize drainage and allow some air to get to the new roots.

6681

‘Gryphon’ Begonia cuttings held in water for a week, no roots yet.

6683

“Hardy Fig” cutting taken two months prior, in August, and kept in a glass of water – nice roots!

The potted cuttings were brought inside and set in front of an east facing window.  No tenting with a plastic bag is needed since the fig already had roots, and the begonias are prone to rot with too much moisture.  Next spring, the fig will be planted in the ground.  Next fall, four foot high metal fencing will be put around the fig, filled with fall leaves and wrapped in plastic until night temperatures rise above 20 degrees in Spring. 

The four begonia cuttings will be separated in the spring and planted in pots large enough to allow the begonias to grow as huge as the mother plant did this past season.  All of these plants will be checked once a week over the winter and watered when the soil is dry to the touch.

6687


Share Button

Ironwood and Sweetspire – Fall Color Combination


6275

Every week my home landscape reveals something new.  A plant comes in to flower, a deer browses on some newly planted perennials, the first tomatoes are ready to be harvested … for the past couple of weeks, its been fall color changes.  It seems to have been a particularly good autumn of bright golds, oranges, and reds, along with the contrast of evergreen pines and junipers(‘Mini Arcadia’ Juniper is shown above).  Many of my young oaks have shown outstanding color this fall.

I have grown most of  the native plants in my home landscape from seed, two of those, the Red Oak (Quercus rubra) and the Ironwood (Carpinus caroliniana) are shown in the photograph above.  I collected the seed from my parent’s yard, a woodland remnant.  The Ironwoods grow along the creek on steep slopes.  Many times, I will find that a beaver has cut down a large number of them, after having failed at felling a large oak nearby.  This year, the Ironwood in my front yard has turned a brilliant gold, really spectacular to see from my frontroom window backlit by the setting sun.  However, because the fall leaf color on Ironwood can vary from red, to orange, to gold, nurseries often will select for red fall color when deciding which plants to line out in their growing fields, so a golden Ironwood may be more difficult to find at a nursery or garden center.

Ironwoods can be found growing in the wild from Maine to Georgia, west to the Mississippi River.  They grow under the shade of White and Red Oaks, on the edge of a woodland, many times, along a stream.  In that situation, the trees are often reaching for the sun, and can get up thirty feet, or more, in height.  In the open landscape, however, a more rounded and shorter form generally results from this low branched tree, with a height and width of twenty feet, or so.  Another option, as was done by the early twentieth century landscape architect, Beatrix Farrand at Dumbarton Oaks in Washington, D.C., is to plant the native Ironwood in rows to form a shaded walk, or allee, and limbed up, revealing the smooth bark, for a quite nice effect.

6277

6276

Under, and in front of the Ironwood is Virginia Sweetspire (Itea virginica), an East Coast native small shrub.  The one I chose to plant is the cultivar ‘Little Henry’ a slightly smaller, at two to three feet tall, version of ‘Henry Garnet’ (three to four feet), both named, according to Michael Dirr’s Manual of Woody Landscape Plants, for Josephine Henry, not for Henry Garnet, who, according to Wikipedia was an “English Jesuit priest executed for his complicity in the Gunpowder Plot of 1605.”  In any event, the fall color can be fairly good on the iteas, generally a burgundy red.  It seems, though, that they would be happier with a slightly more acidic soil than that which I am providing for them.  On the upside, the chartreuse/chlorotic summer leaf color is quite nice in an otherwise dark green landscape.  The best fall color is had in sunnier locations, but the plant does quite well in part sun/shade with average soil conditions. Itea, according to Dirr, is hardy from zones 5 to 9.

6272

Itea and Carpinus (Virginia Sweetspire and Ironwood) are low maintenance, attractive native plants for the designed landscape.  Moderate (both are streamside plants in the wild) to good drainage and partial to full sun can be tolerated by both.  The Ironwood pictured above, was started from seed in the fall of 2005, and set out in the garden in 2007 as a one foot tall sapling.  Most of the growth has occurred in the last four years. 

Autumn is a great time of year to visit a botanical garden or arboretum and discover plants that put on a great fall display, take photos, write down their names, and decide if they might work for your own location.

Share Button