In the Vegetable Garden: Early April Seeding


8118 It’s April in the Chicago area, and it’s time to stop dreaming about getting outside and scratching around in the vegetable garden and start doing some planting!  While there are plenty of vegetables that can be sown directly into the cool spring soil, I generally have a somewhat limited pallet and they include carrots, beets, lettuce, sometimes kale, spinach, and other greens.  I’ll also plant onion sets, if I think to buy some, but usually rely on my shallots to carry me through – and those were planted last fall.  Also in the next few days, I’ll get my potatoes planted.  It’s starting to get busy around here.

8235 
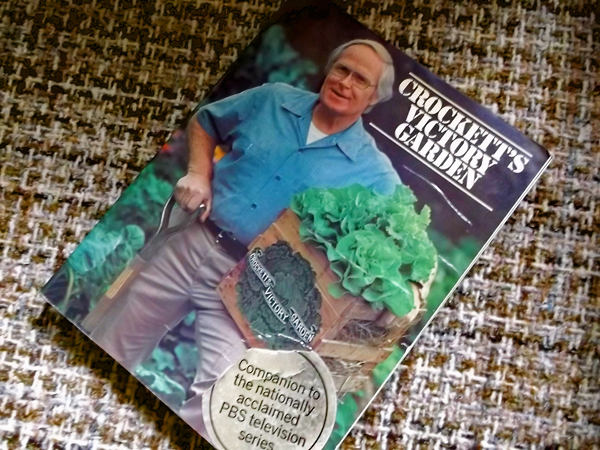
As a kid growing up in the 1970’s, one of the shows I’d watch religiously was Jim Crockett’s Victory Garden on PBS Public Television, running from 1975 until 2007.  Jim had a no-nonsense approach to his garden instruction – he knew what he was about and he told it like it was .. clearly and enjoyably.  It was like having a grandfather in the garden, showing you what to do and what to look out for.  The show had many hosts after his death in 1979, but the show was never as good as when Jim was there.  Thankfully, Jim wrote “Crockett’s Victory Garden”, published in 1977.  The book is invaluable to anyone wanting to grow vegetables in their backyard.  Each chapter in the book outlines the garden activities for a particular month ..if it’s April, it’s time to get the potatoes in the ground, plant carrots, plant out that apple tree, etc.  I still remember buying my copy in the bookstore more than 35 years ago.

8233 
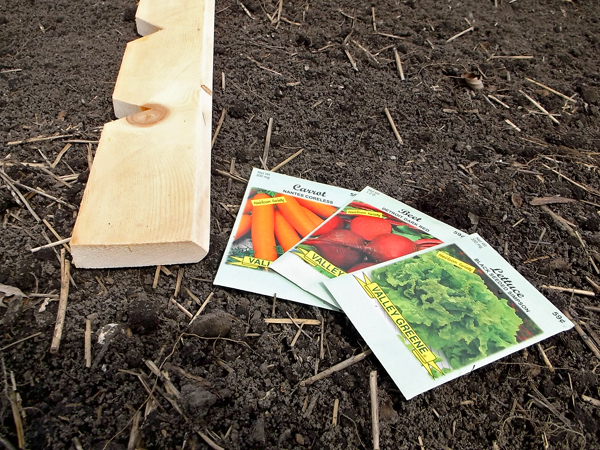
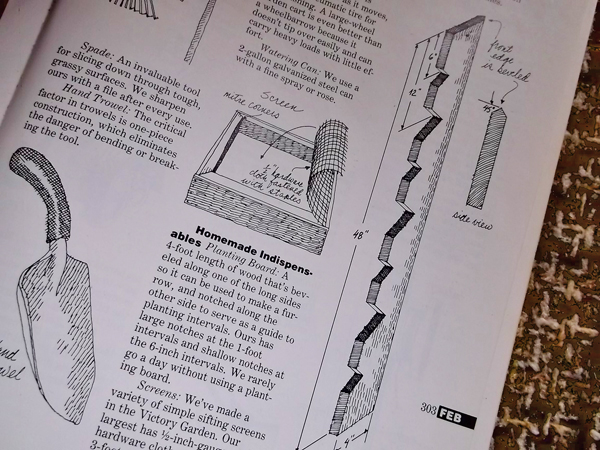
In the book, Jim included instructions on how to make a planting board.  This year, I finally decided to make one for myself, and it’s pretty useful – surprise!  My planting beds are 46 inches wide, so I made mine to fit, rather than the specified 48″ – I shorted my spacing of notches to 5.75″ from the 6″ in the book to account for this shorter length.  I used the planting board the same day it was made a few days ago, when I planted lettuce, carrot, and beet seeds in my vegetable garden. 

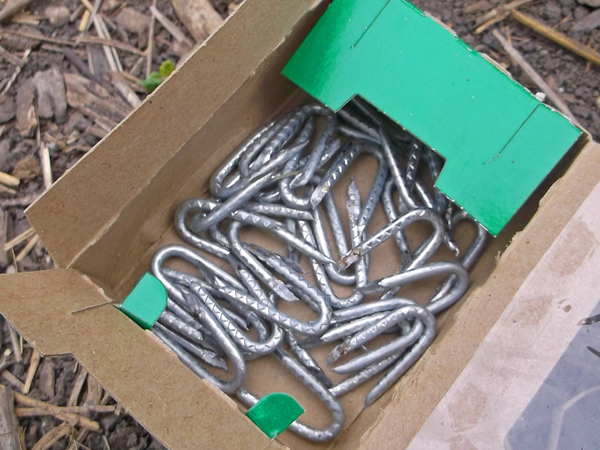
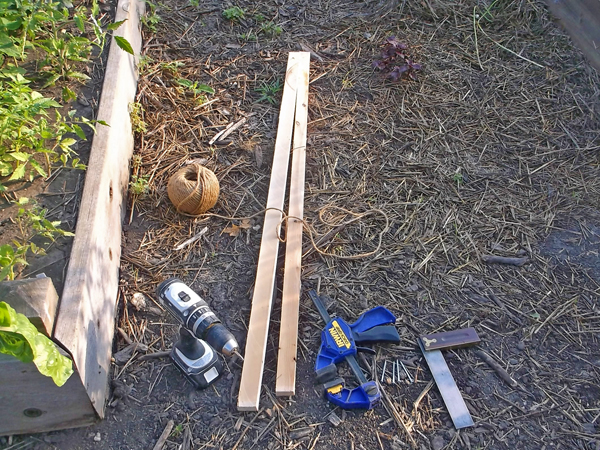
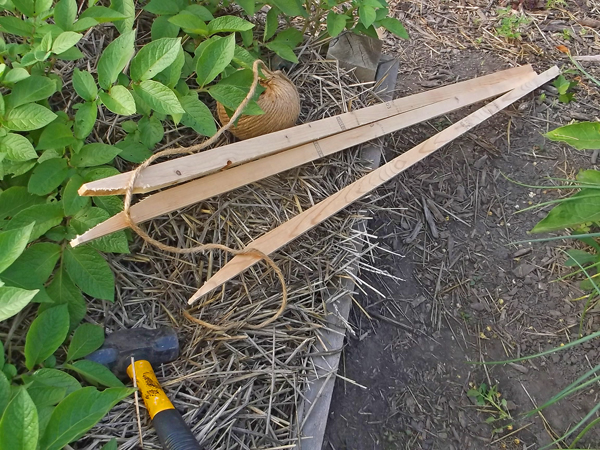
To make my planting board, I used some wood that I had pulled from a trash bin and had lying around the basement, a 1×4 piece of lumber is what is needed:

8114

This piece of scrap wood, destined for the landfill, came in handy

8116

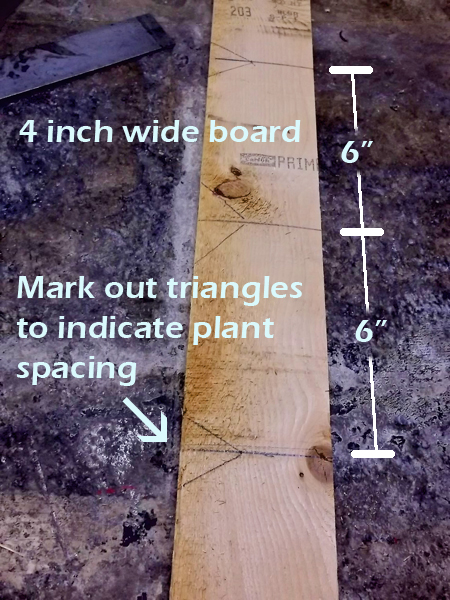
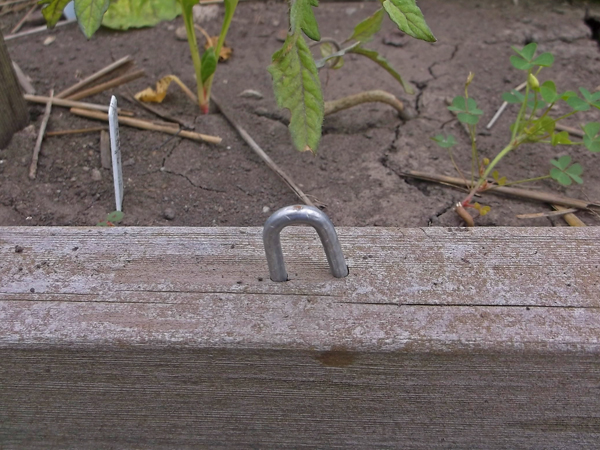
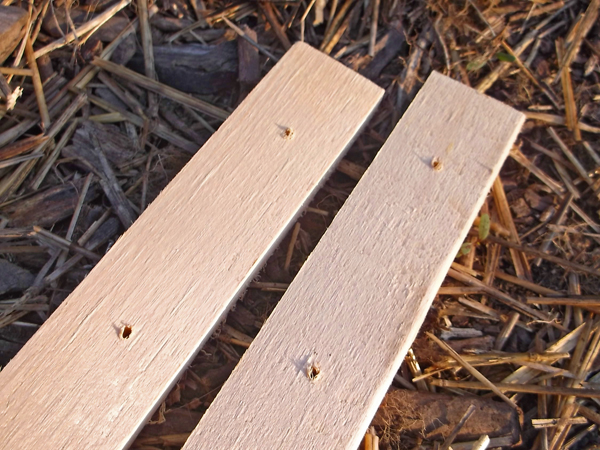
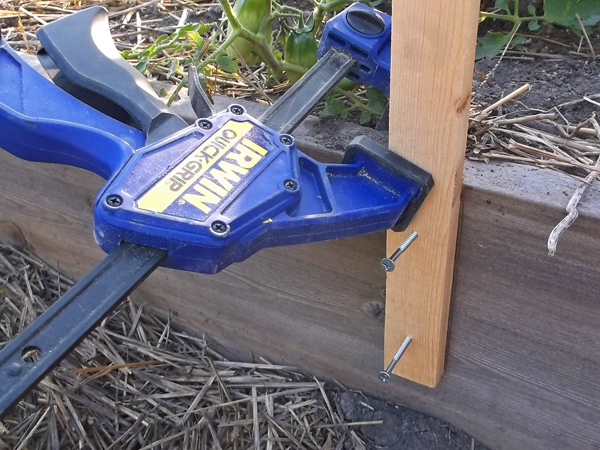
The board was cut to length and marked every six inches where the notches would be cut out

8119

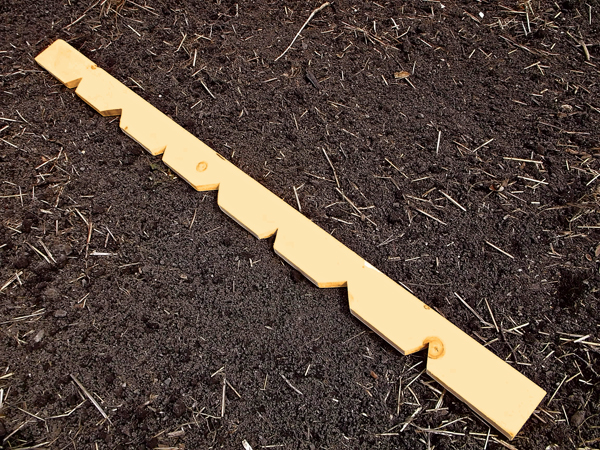
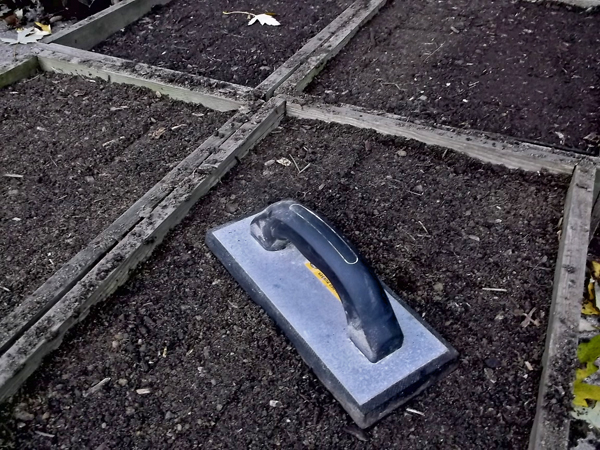
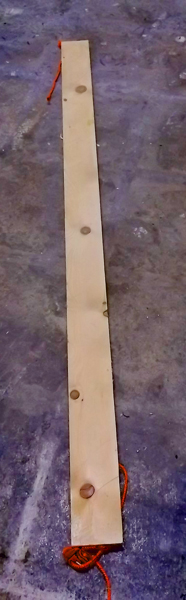
The finished product, ready to go into service for many years. I only question is: “Why did I wait so long to make one?”

8122

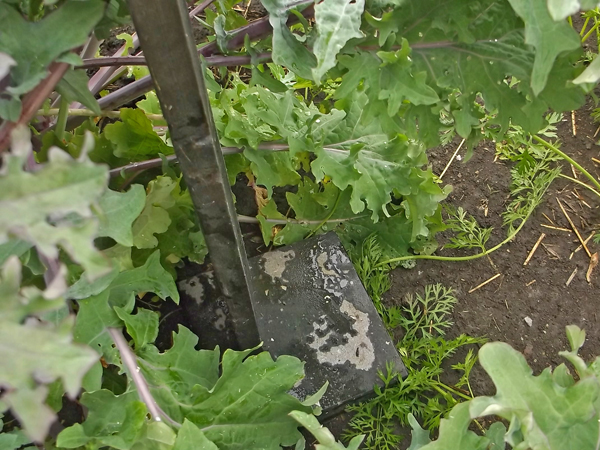
The edge of the board was cut at an angle, allowing it to be used to make furrows for planting seeds

8113 
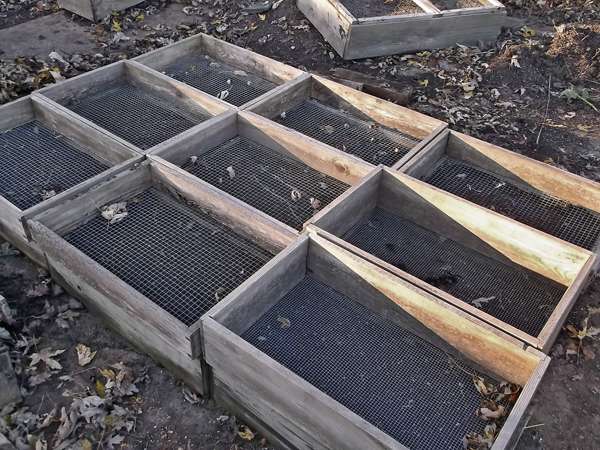
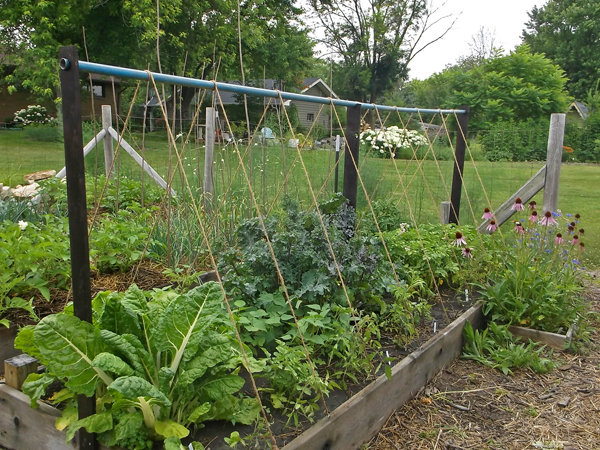
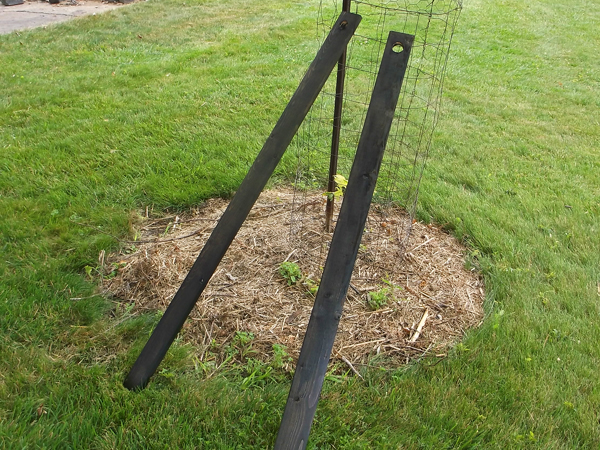
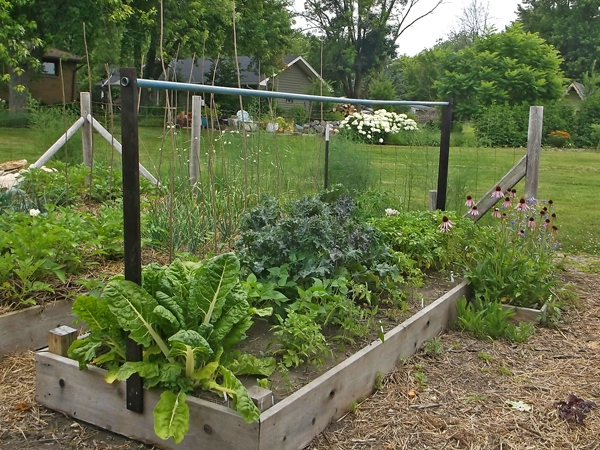
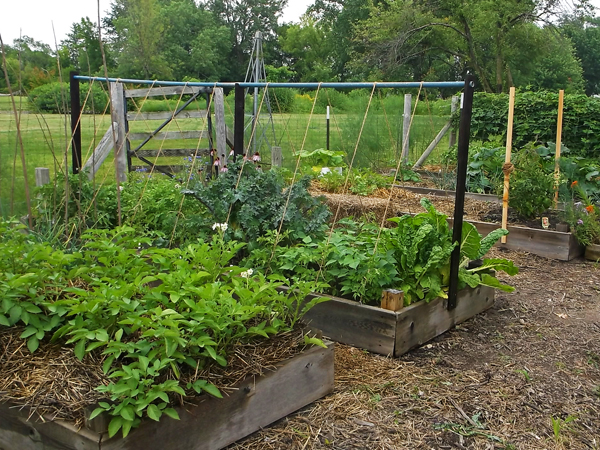
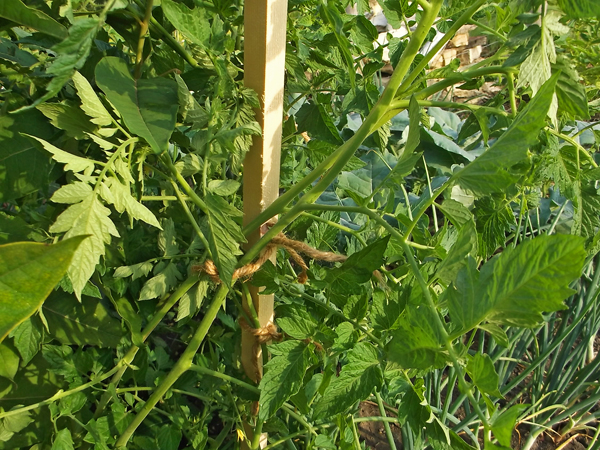
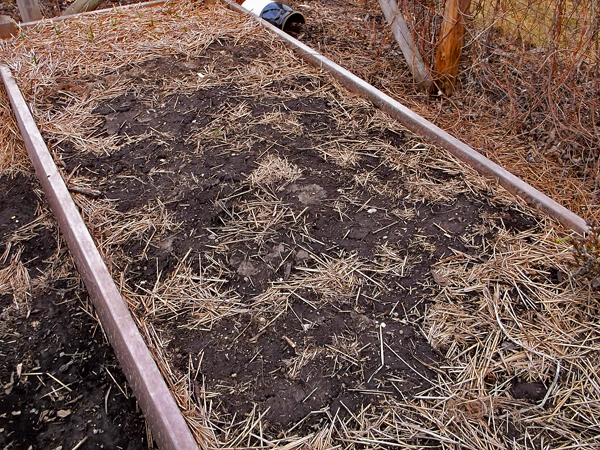
The raised beds of my garden allow the soil to drain well and warm up sooner in the spring, than if I didn’t have raised beds – the poorly drained soil in this part of my yard necessitated the raised beds, so they are not just a luxury.  Last fall, I prepared one of the raised beds for planting out garlic cloves.  The middle of the bed was left vacant for early spring planting of other crops.

8120
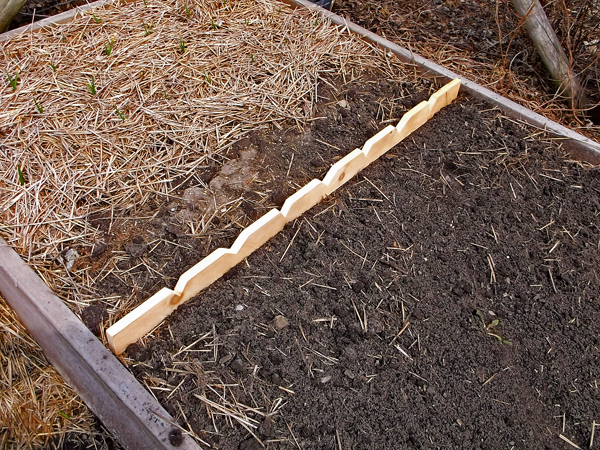
The soil was raked smooth, then the planting board was used to make shallow 1/2 inch deep furrows, spaced about ten inches apart, for the seeds.

8124

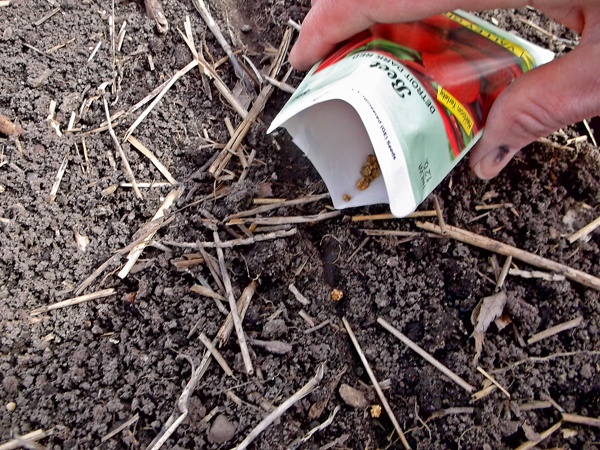
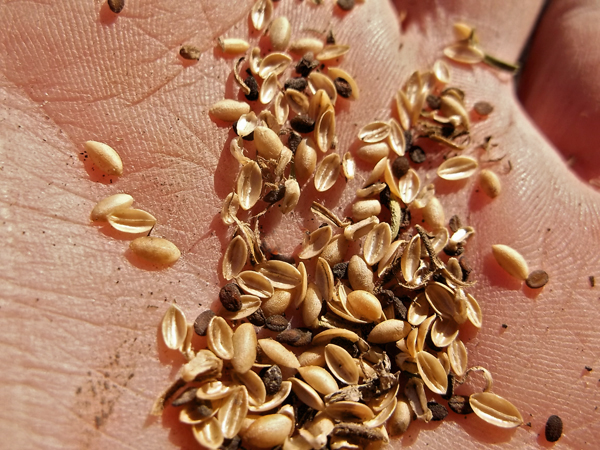
Pinching a crease in the seed packet allows for more control when shaking out the seeds.

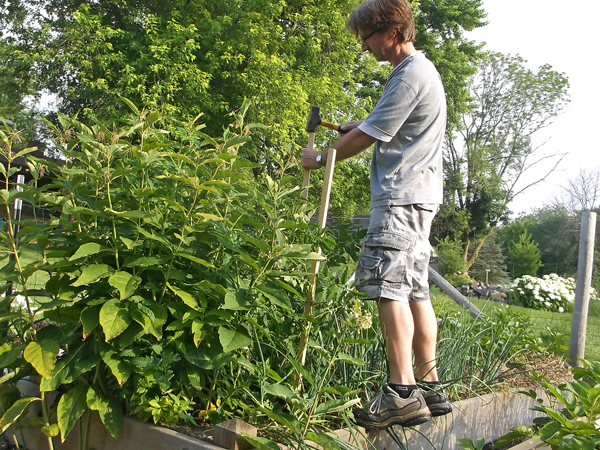
The process went quickly and the angled edge of the planting board worked well in making the furrows consistent.  Trying to avoid too much thinning in a few weeks, the seeds were spaced about 1.5 inches apart.  From each seed packet, I was able to plant four, 4ft rows.  The cost of each seed packet was five cents – yes a nickel each, thanks to a sale at The Home Depot of 20 packs of seed for a dollar.  After the seeds were planted, a steel garden rake was used to tamp the soil down and then the plot was watered and will be watered every day, until the seeds come up, and as necessary after that.

8125

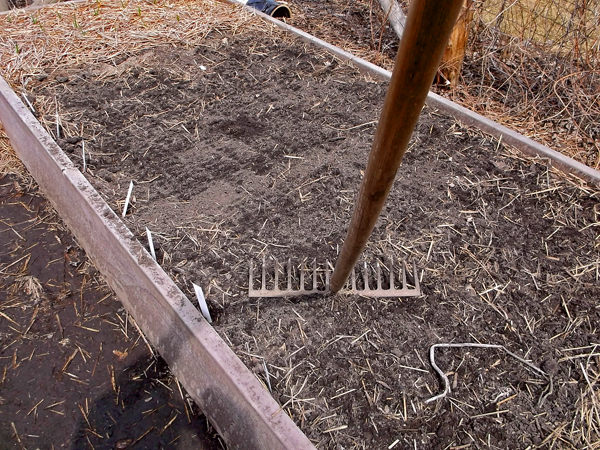
Tamping the soil down around the seeds help them to make good contact with soil moisture – if the soil is allowed to dry out before the seeds spout – they may never appear.

Indoor Seeding

8128
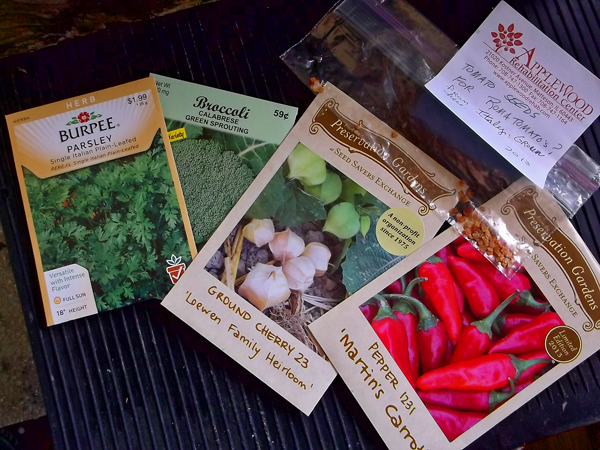
A few vegetables need warm soil (and a long season) to sprout and ultimately produce fruit.  If planted outside in April, the seeds would sulk until soil temperatures reached the 70° F mark, by then, it would be too late to get a harvest from the plants.  For that reason, I start my tomatoes and peppers indoors with bottom heat.  I also planted some parsley, ground cherry, and broccoli this year, since I had room for these as well.

8127
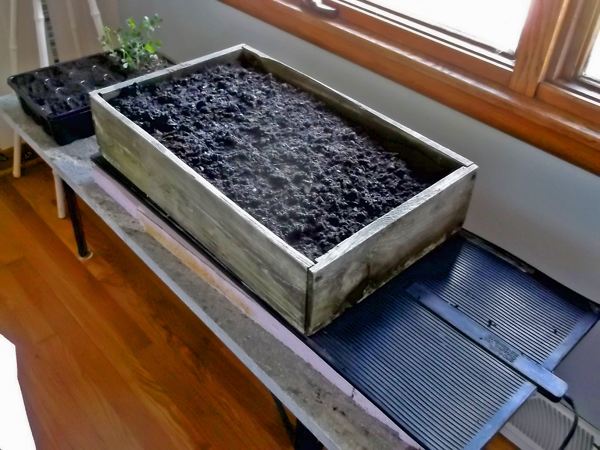
For bottom heat, I use a 14″ by 36″ rubber heat mat made by Bird-x of Chicago.  The mat keeps the soil at about 70° F, perfect for starting seeds.  Once the seeds have sprouted, I’ll unplug the heat mat.  The heat mat is set on rigid foam insulation so that more of the heat goes into the soil, rather than into the room.

8136
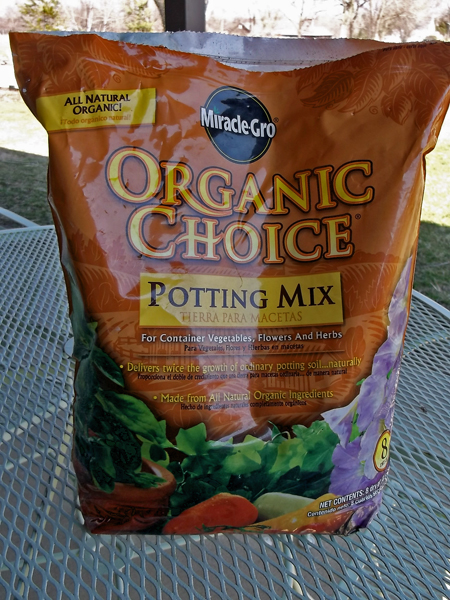
I used a commercial potting mix specifically for vegetables and outdoor flowers to fill my flats primarily because it’s weed and disease free – very important when starting tender seedlings.  A mix of compost, peat moss, and perlite could be used as well, if it is pasteurized at 180° for about a half an hour in an oven or outdoor grill.

8129

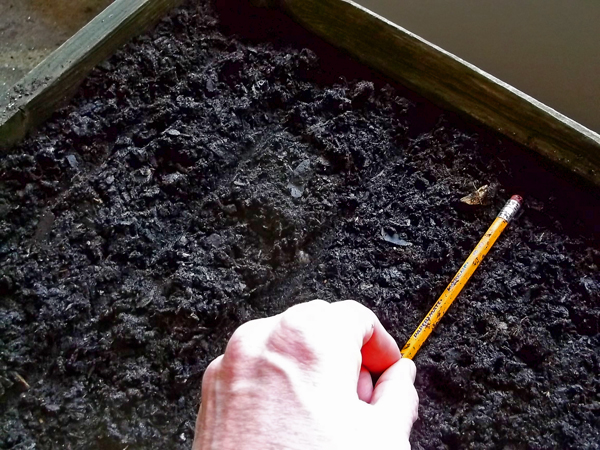
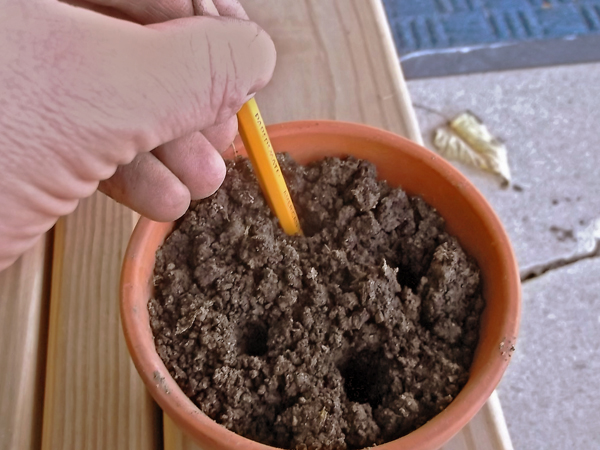
A pencil makes for a handy tool when creating furrows in the seed flats.

I used a wooden seed flat, because the heat transfer is better, the soil stays moister longer, I can get more plants in small area, and I find it quicker to plant than plastic cell flats.  But since I earlier started some Spanish peanuts in a plastic tray, I also planted some tomatoes seeds in the unused portion as well.

8134

Everything is labeled as to species and date of planting, These labels follow the plants later in the season as they get planted out in the garden.  After watering everything thoroughly, plastic wrap is laid on top of the soil to retain moisture in the soil until the seeds sprout.  Once the seeds come up, the plastic wrap is removed, and the seedlings are watered as needed. 

8135

The moist soil is covered with plastic wrap until the seeds sprout, when it is then removed.

In the past, I have tried to grow seedlings under artificial lighting (florescent tubes), without much success.  No matter how close the lights are to the plants or how long I leave them on (using a timer), the plants always got spindly and mostly fell over and died.  This year, the east facing window will have to do, and as it gets warmer outside, I will slowly begin to set out the trays where they can get more light.

Share Button

Have Plants Ready in Spring by Propagating Now in Fall

6290

Sowing Seeds

October and November are not only the months when we clean up our vegetable gardens and dig up our tender flowering bulbs, such as Canna, Tuberose, and Calla Lillies, but also when  we start planning for next season’s gardens and part of that planning involves planting seeds of perennials that have been collected over the past growing season and stored for fall planting. The photo above, shows the cache of seeds from some of my impromptu (as well as planned) seed collecting this season.  Included in the mix above is Prairie Phlox, Cream Baptisia, Lowbush Blueberry, Swamp White Oak, Hill’s Oak, Common Alumroot, Downy Gentian, and Junegrass.

For the most part, the seeds that I’ve collected are native to my area of the Midwest.  These seeds may have been collected from plants that are already growing in my yard, which were grown from seed collected in years previous.  Other seeds are from native plants that are not currently growing in my gardens, for these, I like to find a local, naturally occurring, seed source.  These sites are not always easy to find, they include railroad right-of-ways along roadsides, others are parcels of land in urban areas that were never developed, some are roadside ditches, others are woodlands.  During the growing season, I am always on the lookout for flowers and grasses that I can come back for later, to collect their seed.  Often, a large showy plant that catches my eye from the car, such as Prairie Dock, will be surrounded by other interesting plants, including Tall Green Milkweed (Asclepias hirtella), Leadplant (Amorpha canescens), or Prairie Phlox (Phlox pillosa) that can only be seen on foot – the locations are written down for later seed collection.  It always pays to check out these sites for uncommon plants, marked by common indicator plants such as Prairie Dock.

6292

Harvested Prairie Phlox seed heads still covered with the nylon stockings.

Some seed, such as Prairie Phlox will shoot its seed far and wide as it ripens.  To be able to collect the seed, I cover the pollinated flowers with nylon stockings tied at the base with string or a twist tie.  Finding a brown stocking in an open field, a month or two later, can be a challenge, I therefore also tie on a piece of plastic marking tape with a bright color, as shown above.  Often a rain will cause the enclosed seed head to lean down, making relocation a bigger challenge than might be expected.

6295I mark a few flowering phlox with pink tape that I haven’t encased in nylons – these, I use as indicators of seed ripeness.  Once I see that these indicator plants have released their seed, I go in a cut the stems of the plants with stockings a put them in a dry place until I am ready to extract the seeds.  The picture above, shows the small black seeds mixed in with the chaff – when planting the seed, I don’t bother removing the chaff – for my purposes, it makes no difference if it remains.
5914

My seed flats are made from 1″ by 4″ lumber, screwed together at the corners, with metal mesh (hardware cloth) stapled to the bottom.  While the picture above shows 1/4″ hardware cloth, 1/2″ openings are preferable when leaving the plants in the flats for more than one season.  Set on wood chip mulch, the larger openings allow plant roots to grow down into the mulch, when the flats are lifted, much of the root system which is down in the mulch will come up with the flat, the 1/2″ opening in the mesh allow the roots to pull through it when the plants are removed from the flats for planting.  Ideally, the plants would be removed from the flats as soon as they have their first true leaves, but sometimes the ideal does not happen, and the plants need to be left in the flats for a longer period.  I’ve left Pale Purple Coneflower (Echinacea pallida) in flats, in this way, for over a year – the mature plants, when pulled from the flats transplanted well, and even flowered that same year – where there were roots that broke off, those broken roots were planted and formed plants as well – bonus plants!

5927The seed flats are planted in fall, because many native plants need to go through cold moist conditions before they will sprout, some such as Pasture Rose (Rosa carolina) need two years before they will sprout, others, such as Little Bluestem Grass (Schizachyrium scoparium) do not need any cold treatment, and will sprout shortly after they are planted if temperatures are warm enough.  Plantsman Bill (William) Cullina explains the particular treatments very well for each species, in his book Growing and Propagating Wildflowers of the United States and Canada, published in 2000. 

Around October, when temperatures are still pleasant, I fill the seed flats with soil.  A loose mix is best.  This allows for good drainage, but also makes it easier to pull the plants out of the flats when it comes time for planting out in to the ground, or pots.  This year I mixed some sandy soil with my native silty soil.  In the past, I have used composted wood chips, and even peat moss to make a light soil to go in to the flats.

5928My homemade sifter with 1/2″ metal mesh was made to fit over my wheelbarrow.  The mesh is sandwiched between the wood frame and 1″ by 2″ wooden cleats.  Drywall screws were used to hold the cleats and the mesh to the wood frame of the sifter. One cleat goes across the center of the mesh to keep it from sagging too much.  I used what I had on hand, but using 1″by 8″ lumber, instead of 2 by 8’s, for the sides would make the box much lighter!

5930Before filling the flats with soil, lay down a few sheets of newspaper, this keeps the loose soil from falling through the mesh.  Once the soil is moistened, this won’t be a problem, and the newspaper breaks down by the following spring – no longer needed.

5932Once the flats are full of soil, lightly tamp the soil to make it level.  I use a tool called a “tile float” made for grouting ceramic floor tiles, but a short piece of 2×4 or even a brick will do the job.

6291Label the flats with the name of each species planted, and the date that they were planted.  I also write down the source of the seed.  Top dress each flat with a bit more sifted soil – no more than a half inch is needed, even less for dust like seeds.  Then tamp the soil again so the seed makes good contact with the soil.

6297Cover your flats with wire mesh to protect the seeds from squirrels, birds, and other curious animals.  I used empty seed flats to protect my seeds, but window screen material, weighted down with stones works fine, as well.  The screening will allow moisture and sun in and keep varmints out. 

With the rare exception, all of the native plants in my yard, including my oak trees, were grown in the way described above.  It’s easy, cost effective, and rewarding.  When spring arrives, you will have plenty of plants waiting for you to set out in the landscape.

6288

Rooting Cuttings

For some of my tender herbs, such as the Pineapple Sage (Salvia elegans) shown above, ornamentals, including showy begonias, and plants such as edible figs, I take cuttings at the end of the season and over winter them indoors. 

The Pineapple Sage, a native of Mexico, is a favorite of mine.  The scent of the leaves is amazing, and the red flowers, late in the season, are the most intense red I have ever seen – they seem to almost glow!  Of course, they can be purchased in spring at many garden centers (I bought my original plant from Ace Hardware), but growing the plant from cuttings in late summer (as late as October), to over winter in your home is so easy, it seems a shame not to.  Take enough cuttings to give, as plants, to gardening friends in the spring. 

To start, cut off a six inch (more or less) length of stem, just below a leaf node, from the mother plant in late summer (now thirty inches tall in your herb garden), remove the leaves from the lower three inches of the cutting and pinch off the tip growth, as shown above.  These can either be stuck right into a mix of 50:50 sand to soil, or perlite to soil or they can be dipped into a jar of rooting powder (rooting hormone, aka. plant growth regulator).  A light dusting is all that is needed.  In July, I took a cutting and stuck it right into some soil in a pot and the Pineapple Sage rooted, at the end of the season, the rooting powder may move things along more quickly.  Make sure to keep the cutting in bright light, but not direct sunlight, until rooting has occurred – about three to four weeks.

6300

6299  6301

6335

For the cutting I took in July, I simply put the pot in a shady spot outside and kept the soil moist, and the plant rooted just fine in less than a month (with no rooting powder).  For the cuttings taken in October, I brought the pot full of cuttings inside and set it in a saucer of water to moisten the soil, the next morning, I removed the pot from the  saucer of water, placed it near a east facing window, and loosely placed a stiff zip-lock bag over the pot of cuttings to help keep the humidity higher around the cutting than the dry ambient air.  The clay (unglazed terra cotta) also absorbs and gives off moisture, thereby aiding in keeping up the humidity inside the bag, unlike a plastic pot.  It is important to let in some fresh air, so do not seal the bag tightly around the pot of cuttings or they will be likely to rot, not root.  Remove the bag every few days to check the soil moisture and to remove any leaves that might have fallen on to the soil – they tend to get moldy if not removed.  Once the cuttings show new growth, in a few weeks, remove the plastic bag and water as needed.


Overwintering Figs and Ornamental Begonias

5471

Ripe figs ready to pick and eat fresh in August!

1111

Edible Fig tree in need of pruning.

5476

Part of the crop, ready to eat, or freeze.

5481As I clean up the garden in early fall, I like to take cuttings of some of my Ornamental Begonias, such as ‘Gryphon’ (shown at right in the photo below)- a newer cultivar that did so well for me this past summer, that I would like to have plants for next summer as well.  Other plants, such as my edible fig, were in need of a pruning – can these cuttings be rooted? No harm in trying!

5069As can be seen in the photo, both the ‘Gryphon’ (yes, that is the correct spelling) and an old fashioned “Hardy Begonia” got quite large this summer, too large, in fact, to bring indoors (sadly).  Taking cuttings is the only option, if I want the plants to continue in my garden next year.  The fig tree overwinters in my garage, it can take below freezing temperatures, into the 20’s, but must be protected if kept outside in the Midwest.  The crop of figs it produces is wonderful, some of the rooted cuttings will be planted in the ground next spring and overwintered in place with protection – stay tuned for that process next fall.

6677The photo above was taken in November, the begonia cutting were made as I pulled the mother plants from their pots a few weeks earlier.  The fig cutting, the “stick” in the photo above, was taken in August, the leaves immediately dried and fell off, leaving only the stem, failure, or so I thought.  Being a mixture of lazy and curious, I left the cutting in the glass of water for two more months, changing out the water once a week.  During that time, I could see the little white buds on the stem below the water, eventually they turned into roots.  Success! (so far)

6678Even though it was mid-November, it happened to be warm enough to work outside, so I brought the plants and a few pots out to my backyard pile of soil (handy to have).  I made sure that that pots had good drainage, then filled the pots with soil – with about a quarter of the soil consisting of perlite to maximize drainage and allow some air to get to the new roots.

6681

‘Gryphon’ Begonia cuttings held in water for a week, no roots yet.

6683

“Hardy Fig” cutting taken two months prior, in August, and kept in a glass of water – nice roots!

The potted cuttings were brought inside and set in front of an east facing window.  No tenting with a plastic bag is needed since the fig already had roots, and the begonias are prone to rot with too much moisture.  Next spring, the fig will be planted in the ground.  Next fall, four foot high metal fencing will be put around the fig, filled with fall leaves and wrapped in plastic until night temperatures rise above 20 degrees in Spring. 

The four begonia cuttings will be separated in the spring and planted in pots large enough to allow the begonias to grow as huge as the mother plant did this past season.  All of these plants will be checked once a week over the winter and watered when the soil is dry to the touch.

6687


Share Button

Three Effective Tomato Supports


s 1944

How did I wind up planting twenty one tomato plants this spring?  Anyone that knows me, knows that I don’t like tomatoes.  Well, raw tomatoes anyhow.  So, 19 of those plants are Roma type tomatoes, cooking tomatoes.  You see, I love making homemade pizza, pasta sauces, and stews in winter, so this year, I came up with the idea of canning my crop, rather than freezing, as I’ve done in the past.  Freezing is easy.  Pick a few ripe tomatoes, put them in a freezer bag, repeat.   When the bag is full, start a new one.  Canning doesn’t work that way.  You pick a bushel of tomatoes, you blanch them, remove the skins, boil lots of water ….  Well, that’s why I planted so many Roma tomatoes, one does not can three jars of sauce, no, one does not.  One spends all day in a steamy kitchen, canning dozens of jars of tomatoes, so that when friends come over, and you ask them to go into the pantry to get a jar of tomato sauce, they come out and say … well, who knows what may come out of their mouths when they see jar upon jar of home canned tomatoes.  All I know, is that next winter is going to involve a lot of good cooking, and every time I pull down a jar I’m probably going to think “These are the greatest f@cking tomatoes ever”, but what I’m thinking right now is “These f@cking little plants better get going, or I’m never going to get any tomatoes.”  So to help them out, I built them a support system.  Something we all need, to do our best.  Don’t you think?

s 1935

Everything I used to make this A-frame, I had on hand, so the cost of construction was zero.  Well, I did use fifty cents worth of twine, considering I paid a dollar for it at an estate sale,  and the eighteen fence staples (left over from fencing the vegetable garden) had some cost, but the wood and aluminum tubing were found in the trash.

The construction is simple, utilitarian you might even say, although elegant in it’s simplicity – more Mies Van der Rohe and less Louis Sullivan in it’s direction.  The big idea is that each plant, as it grows, get tied to the the jute twine.  This keeps the fruit off the ground, improves the air circulation around the plants, and gets the plants up in the sunshine, so that, hopefully, they will produce a good, no, GREAT crop that can be “put up” for winter use.

s 1937

The wood supports have two, two inch wood screws drilled into the red cedar raised beds.  A clamp was used to hold the piece in place prior to driving screws in with a cordless drill.

s 1939

A drywall screw holds the thin aluminum tubing in place.  Inexpensive iron gas line pipe or electrical conduit could be used in place of the aluminum tubing. The wood was stained simply for appearances, and because I had the stain on hand.

s 1936

Next, fence staples were hammered in near each tomato plant.  In hind sight, were I to do it again, I would leave one side of the staple hanging over the inside edge of the bed, thus creating a hook -this would make running the jute string go more quickly.  I used one continuous line of string for the entire run.

s 1940

The string was pulled through each galvanized staple (eye screws, cup hooks, nails, etc. could be used also), then wrapped twice around the pipe and down to the staple on the opposite side, and so on down the line.

s 1941

As the line was strung, the twine was kept taut, however, since the tubing was actually two telescoping pieces (it was part of a swimming pool skimmer), it began to bow a bit in the middle.  A third wooden support was added where the two pipe sections intersect.  This support pushed the pipe up, keeping the jute twine in tension.

s 1945

The base of the middle support sits on a piece of stone, to keep it from driving itself into the soil.

s 1946

The two varieties of plum tomatoes being grown, San Marzano and Opalka, are termed “indeterminate”, or vining type, as opposed to “determinate”, or bush type tomatoes.  The structure was designed with this vining growth habit in mind.

s 1953


The Mighty ‘Mato get a Florida Weave

Ever hear of a grafted tomato? No?  I hadn’t either, but I am currently the proud owner of the Mighty ‘Mato, a grafted San Marzano tomato.  Apparently, the vigor and disease resistance, is matched only by the amazing output of tomatoes – and maybe the marketing, it even has it’s own Facebook page.  Gives a whole new meaning to “liking” a tomato!  Eager to believe it’s promise of incredible growth and productivity, I knew that I needed a support structure that was up to the task.

s2 1924

The scion (fruiting part of the tomato) is apparently grafted on to the rootstock of a wild, or undomesticated, form.  The graft is marked with a tag, so that the gardener does not put soil over this area.  The graft must stay above the soil line so that the scion does not root, and thereby negate the mighty input of the wild rootstock.

s2 1929

I first saw the “Florida weave”, used as a way to support tomato plants, at a local plant nursery a few years back.  They had long rows of tomatoes, and the twine wove in a out between each plant and around wooden stakes.  I only had one plant, but I feared that a simple wooden stake pounded into the ground would not be enough for this ‘mato.  The Florida weave, hmmm, that just might work.

s2 1897

When it comes right down to it, other than a few tools, all that is needed are a couple of wooden stakes (of course, metal fence posts would work too) and some twine.   A carpenter’s square, you ask?  Yes, I grew up watching Master Carpenter, Norm Abram, “true and square.”

s2 1899

The posts were predrilled, to avoid having the wood split as I drove in the screws.  A clamp is helpful as a third hand.

s2 1900

Once the posts were in place, the jute twine was woven back and forth between them, and around both sides of the vine.

s2 1908

The twine was cut with an additional length  left for impromptu weaves as the Mighty ‘Mato continues to grow.

s2 1912


Sometimes a Wooden Stake is Enough

s3 1921

Especially for bushy “determinate” forms of tomatoes.  “But what about cages?”  Cages take too much room.  The way I garden, I don’t allow for much space between plants, and if there is space, I  plant some carrots or shallots, maybe some marigolds in that open space.  Cages would be a difficult fit.  I this case, a Rutgers tomato and a black cherry tomato (impulse buy) were planted near a Poke Milkweed plant (much smaller a month ago!).  A cage would not work, and besides, I would have to buy the cages, I have scrap wood to make stakes.

s3 1916

As the plants had already gotten pretty big by the time I got around to staking them (they were using the milkweed as support), I put a stake near each major stem and tied it off, not too tight, allowing for stem growth.

s3 1918

I like to use thick jute twine when tying off tomatoes, it’s  less likely to  cut into their tender stems.

s3 1922

Share Button