Comfort Food: Chicken Potpies

9507

Growing up, store bought Banquet chicken potpies were almost always in the freezer, ready for a quick last minute dinner – I loved them, especially in winter, they’re great comfort food.  As with many of my childhood favorites, however, including pizza, egg rolls, and giant soft pretzels, I wanted to try my hand at making a great homemade version of my childhood favorite.

The first thing I learned, is that the definition of “potpie” is a bit slippery.  Most recipes have only a top crust, some traditional versions apparently have no crust – just a thick stew in a, wait for it … pot.   When I visited the Walnut Room at the downtown Chicago Marshall Field’s Department Store a few years back, I of course ordered their famous chicken potpie.  What I remember being served was a ramekin of chicken stew with a croissant set on top of it – not what I was expecting.  Maybe they ran out of pastry crust that day, or decided that puff pastry was ok to use instead of a flakey pastry crust – and where the heck was the bottom crust? – that was missing all together – this was not at all what I was expecting.   Maybe what I wanted was not a true potpie, but simply a better version of what Banquet was calling a potpie – off to the kitchen.

Or rather, to the cookbooks and Google.  Ida Baily’s cook book from 1932 would certainly have a good recipe … or not.  She had versions of meat pies with biscuits on top, meat turnovers – not the historic precedent that I was looking for.  Same for The Joy of Cooking.  Martha Stewart, certainly – well, she came close to what I was looking for, but she also had no bottom crust, and her filling was not what I was trying to achieve with my version.

Ok, so after making chicken and dumplings last year, I thought, “Hey, this could make a great potpie filling.”  And so it did, minus the dumplings.  Now for the crust.

I tried several recipes, some were too buttery – distracting.  An all lard crust was very flaky, but seemed kind of dry – good, but still lacking what I had in mind.  Maybe half butter, and half shortening? BINGO.  To my taste, both vegetable shortening (such as Crisco) and lard worked equally well with butter in the pastry recipe which follows.  I am not sure which is healthier, but, for me the taste is the same.  Ida Baily Allen, in her 1932 Cooking Menus Service cookbook, even mentions that half the total shortening could be cream cheese – hmmm.  I haven’t tried that in this recipe, but have used cream cheese in making pecan tassie dough, and it’s great, so why not?

The pie crust recipe that I went with actually came from the 2006 Marshall Field’s Cookbook (which I bought last year at an estate sale for $3) which included “Mrs. Hering’s Famous Chicken Potpie”.  The recipe is pretty much the same as any other pie crust recipe, except for the fact that it calls for ½ cup butter, and ¼ cup shortening .. and that is a very important and key difference.  I’ve also used Martha Stewart’s “basic pie dough” recipe and it works well if half the butter is substituted with lard or shortening.  Her recipe can be found here.

7123

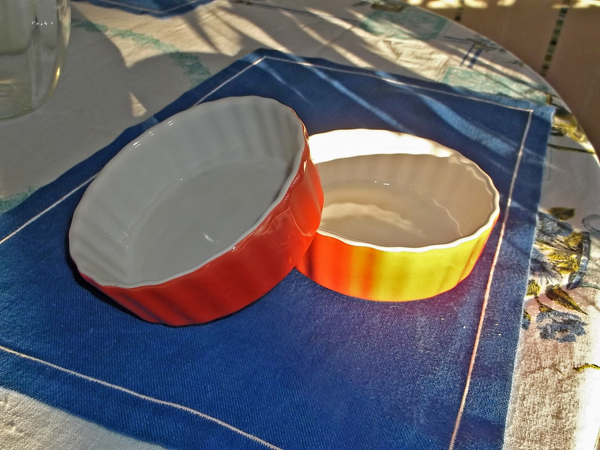
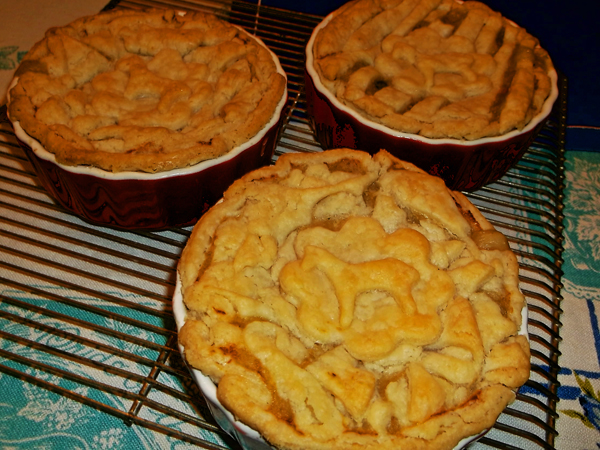
With Banquet pot pies as the model, I went in search of little four inch round aluminum pie plates.  Off to the dollar store.  While in the Dollar Tree store, I scanned a lot of disposable foil cookware – however, no mini pie plates, sadly.  Just as well though, since they did have ceramic ramekins for a dollar each. BINGO.  I bought nine.  At 4 ½ inches across and holding 8oz (one cup), they were perfect.

Day One

Admittedly, making homemade potpies is not as easy as opening the freezer, pulling out a pie, and baking – but that is why, when I do make them, I make a lot, and freeze most for future dinners.  What follows is the nuts and bolts of making my unique (as it turns out) version of chicken potpies.

Crust Recipe

  • 1 ½ cups all purpose flour
  • 1 ½ teaspoon salt
  • ½ cup of cubed butter, chilled
  • ¼ cup chilled shortening, lard, or cream cheese
  • 3 to 4 tablespoons of ice water

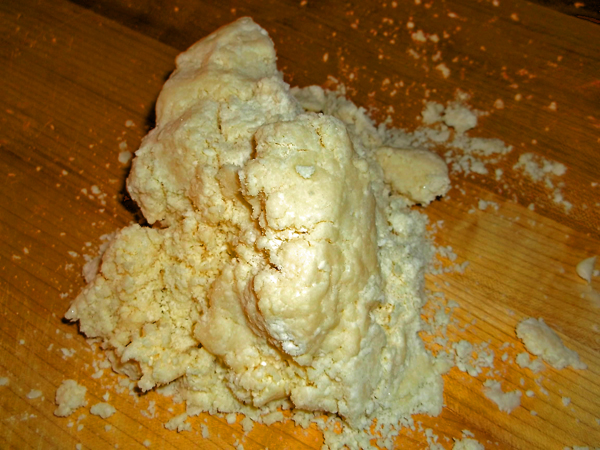
Add first four ingredients to the bowl of a food processor, pulse until mix is crumbly, add water slowly, one tablespoon at a time, pulsing three or four times after each addition.  The resulting mix will be a bit dry, as shown below:

6965

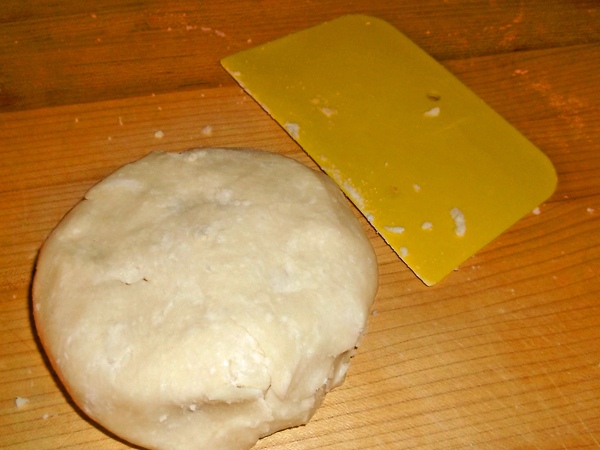
On a clean work surface, press the dough into a flattened round, and wrap in plastic wrap.  Refrigerate for at least one hour, or overnight.  One dough recipe makes three potpies using the ramekins described above.  I made 15 potpies last time so I needed 5 rounds of dough.

6966

Chicken Filling

For the filling of the potpies, I simply make a thickened chicken soup with lots of shredded chicken meat (dark or white meat) and the addition of a cup or so of frozen peas.

To make the stock you will need:

  • 1 large onion cut in half
  • 4 large carrots coarsely chopped
  • 4 stalks of celery coarsely chopped
  • 4 chicken thighs, with the addition of neck bones, back bones, and wing tips if you have them.
  • 1 tablespoon of whole black peppercorns
  • 8 cups of water
  • 4 chicken bouillon cubes or 2 tablespoons of chicken base
  • 3 bay leaves

Add all of the above ingredients to a large stock pot and simmer over low heat for three hours.  Remove the thigh meat (or breast meat) after one hour of cooking.  Keep the backbones, etc. in the stock for the full three hours.  After three hours, strain the stock, discarding the bones and vegetables. Cool the stock overnight in the refrigerator.  Remove any solidified fat the next day.

Day Two

Bring the strained stock to a simmer and add:

  • 5 peeled and diced carrots
  • 5 chopped stalks of celery
  • ½ cup fresh parsley
  • Shredded chicken meat from cooked thighs or breasts
  • 1 cup of fresh or frozen peas
  • Add salt and pepper to taste

Once the above ingredients have come to a simmer, you will need to make a roux to thicken the stock.  To do this, combine in a small pan:

  • 1 stick of butter (=½ cup)
  • 1 cup all-purpose flour

Stir mixture over medium high heat for 3 or 4 minutes until bubbling, add the roux to the stock and stir until stock is visibly thickened.   Depending on the amount of stock, you may need to slowly add the addition of a mixture of ½ cup of flour in 1 cup of cold water.  You may, or may not need the whole amount of flour/water mixture to bring the stock to the proper thickness. Set filling aside to cool slightly, or chill overnight.

6959

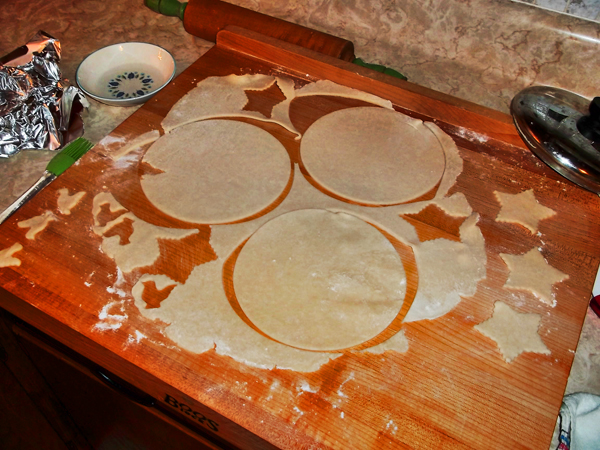
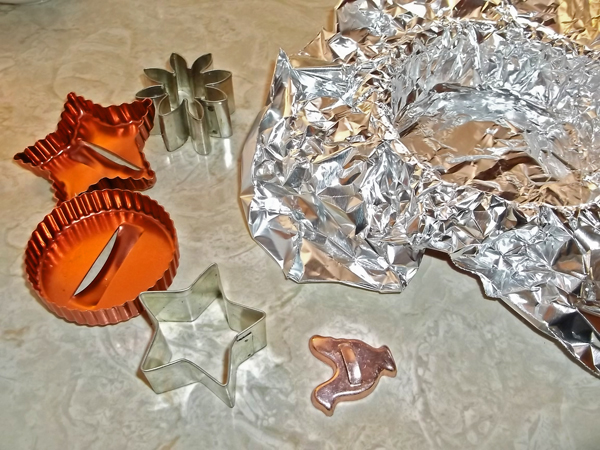
While the filling is cooling off a bit, roll out the chilled pastry dough to approximately 1/8 inch thick.  I just keep rolling out the dough until I can cut out three rounds using a pot lid which cuts out perfect 7 inch disks – the right size to make the bottom crusts in my 4½ inch ramekins. Cut up the remaining scraps for the top crust.  I sometimes cut out shapes with cookie cutters for added decoration.

6955

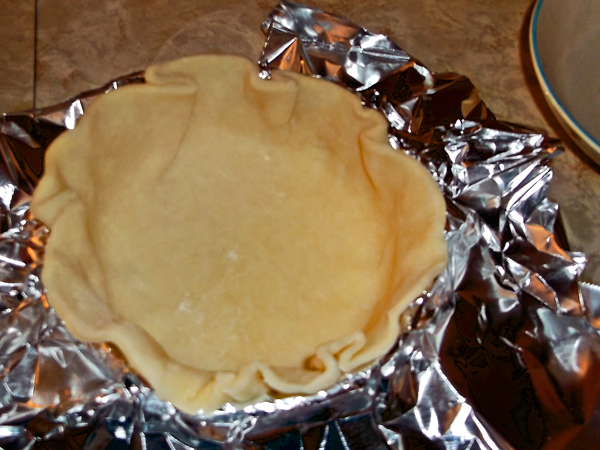
If you plan on freezing some of your potpies for later, line your ramekins with foil before laying in the bottom crust, allow enough foil to fold over the top of the pies when completed.  Remove each foil wrapped pie from the ramekin, place into individual freezer bags and freeze for later use.

6960

6961

To save time, use a ½ cup ladle to fill the dough lined ramekins with the thick filling.

9505

6963

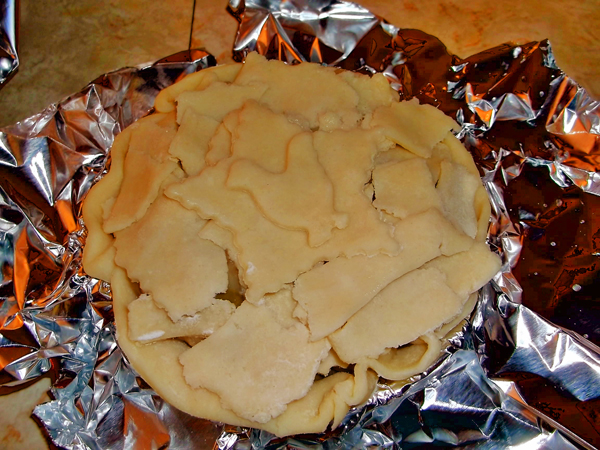
Then top the pies with the scraps of dough left after cutting out the bottom crust rounds.

6964

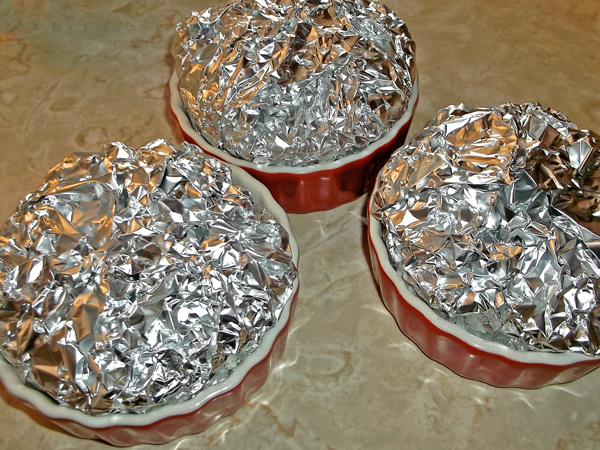
I partially freeze the foil wrapped potpies while still in the ramekins for one hour before removing them from the ramekins and placing the wrapped pies in individual freezer bags – this step helps them keep their shape while handling them without the support of the ceramic ramekins.

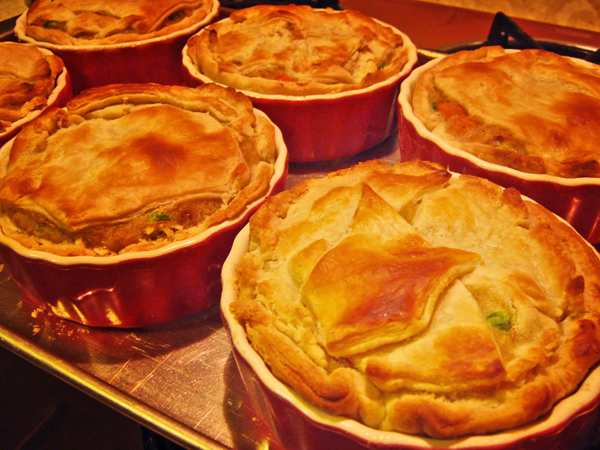
Of course, the pies that you are going to bake right away don’t need to have a foil liner, they can be baked at 375° F for 20 to 25 minutes or until golden and bubbly.  To bake the frozen pies, you can remove the foil and place the frozen pie in a ramekin to bake, or simply open up the foil, to reveal the top of the potpie and bake on a cookie sheet.  Either way, a cookie sheet under the potpies will collect any drips and make for easier clean up.

9506

The filling for these pot pies can be just about anything that you think might be good, including adding seafood, substituting beef stew for the chicken version, or going completely vegetarian and using what is available from your garden.  I may try a cream of asparagus version of this recipe this spring. Good luck, and I hope that you enjoy my version of chicken potpie as much as I do.

6969


Share Button

Gardening in January .. Amaryllis Bulbs and Blooms

3007

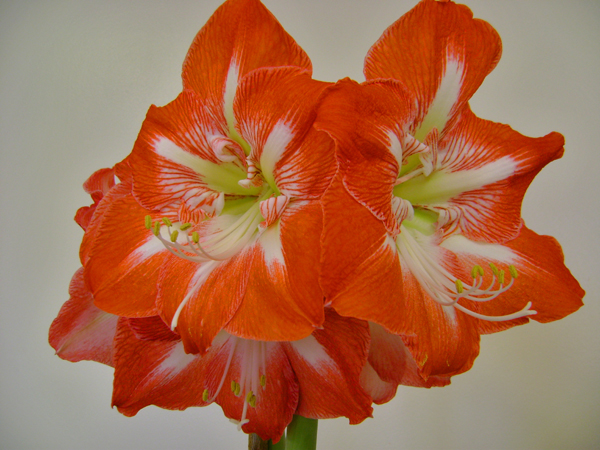
Amaryllis bulbs are one of those fool-proof house plants, often given as hostess gifts at Thanksgiving dinners, with their hopeful boxes boasting pretty pictures of head sized flowers in shades red, pink, or white.  The downside is, that lurking inside the box is an intimidating bulb, equally large – the size of a baseball.  The person receiving the gift smiles, says “Thank you, how lovely,” and re-gifts it to their co-worker at Christmas.  And that’s too bad, because these tropical flowers truly are easy to grow.

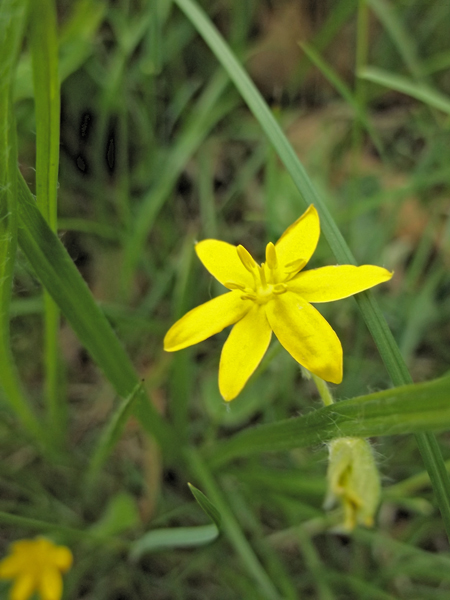
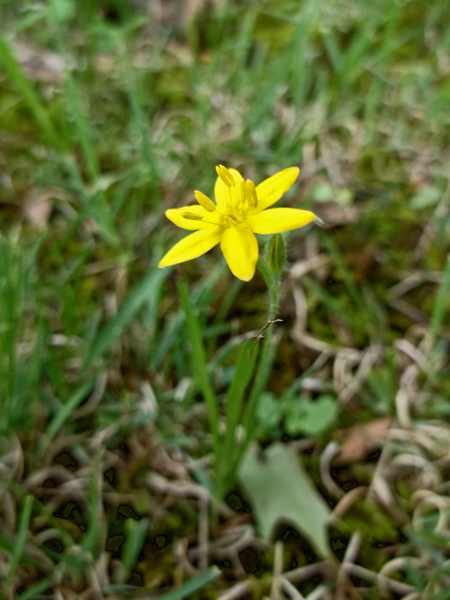
While the gangly bulb rolling around in the box may have been produced in Holland, the plant was originally found growing in tropical Central and South America, in poor often rocky soil, some are even “air plants” or epiphytes.  True Amaryllis, Amaryllis belladonna, are native to South Africa, and look similar to the cold hardy (zones 5 to 9) Asian lily that gardeners call “Naked Lady,” Lycoris squamegera – both plants have smaller pink tubular flowers.  The ones sold on the shelves of grocery stores, while in the amaryllis family, are actually in the genus Hippeastrum – not to be confused with Hypoxis hirsuta, or Yellow Star Grass, also in the amaryllis family, and native to the prairies and open woodlands of the Midwest:

0257

Our Midwestern native amaryllis – Yellow Star Grass

0264

Yellow Star Grass, Hypoxis hirsuta

Pretty cool, huh? Very impressive, beautiful and ….

0265

… SMALL!  The flowers are one half inch across, the plants are approximately four to six inches high.  Fortunately, they are aware of this fact, and bloom early in the growing season when other plants are still short as well and pollinators can still find them – the photos above, were taken on June 2nd of 2013 in Will County, Illinois at a remnant savanna. 

But, I digress.  Those grocery store amaryllis – hope in a box.  The bulbs, as I mentioned, are easy to get to bloom.  Fill a water holding container with two inches of gravel (or glass florist gems), fill with water to the same level, place the newly purchased bulb on top of the water and gravel, then fill in around the bulb with more gravel so that 1/3 of the bulb is above the gravel and all of the bulb is above the water line.  Place your creation in a sunny window, the roots of the bulb will grow down into the water, and leaves and a flower bud will emerge shortly. In in three to six weeks the eighteen inch tall flower stalk with be abloom (yes, that’s a word.)  Keep the water level at just below the bulb, or the bulb will rot, rather than bloom – maybe not so fool-proof, and maybe you should have re-gifted it after all. 

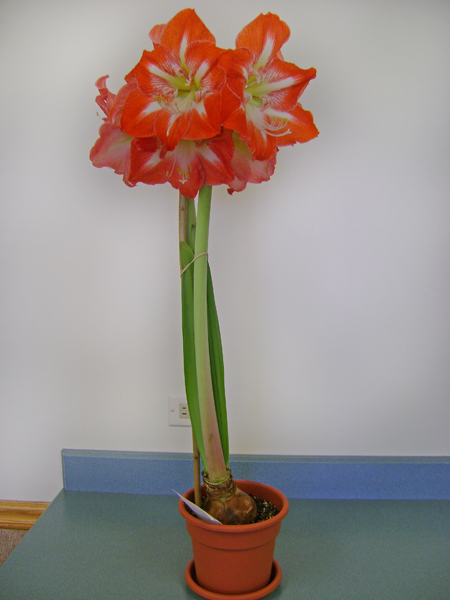
The bulbs could also be potted in soil – the pot should be just larger than the bulb itself and at least 1/3 of the bulb should be above the soil line.  When first potted up, water well, from below preferably, then don’t water again until the first sign of growth occurs, then water approximately once a week.  In a short time, you will be able to show off your efforts:

3004In the photo above, the bulb is mostly above the soil line, not a problem.  Also notice that the flower is staked to a piece of bamboo, this will help the top heavy flower from falling over. 

When flowering, keep the plant out of the sun to extend the bloom time.  When flowering has ended, cut off the flower stalk, and put the plant in full sun.  Water the plant no more than once a week and place the plant outside after danger of frost has past.

5072

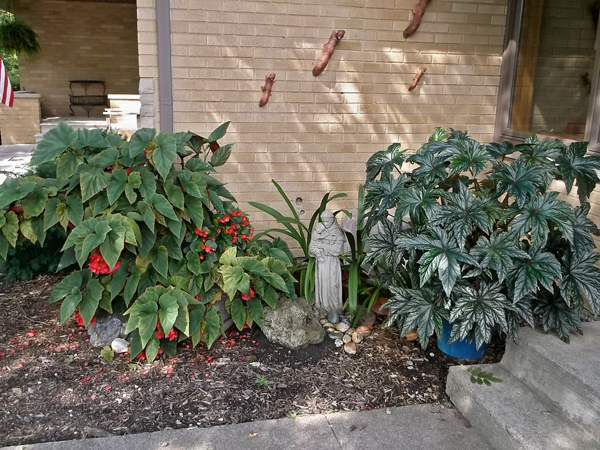
Potted amaryllis spending their summer behind St. Tony

When October arrives, stop watering the plants (or August 1st, if you want to have them bloom again for Christmas/ New Years Day/ pick your holiday) and move them into your basement or garage for six to eight weeks – the plants must not freeze, but don’t need sunlight while going dormant – I put mine in the garage until it gets too cold, then move them into the basement.  They need to stay unwatered and in a dormant condition for six to eight weeks, before they can be coaxed into blooming again.

7078

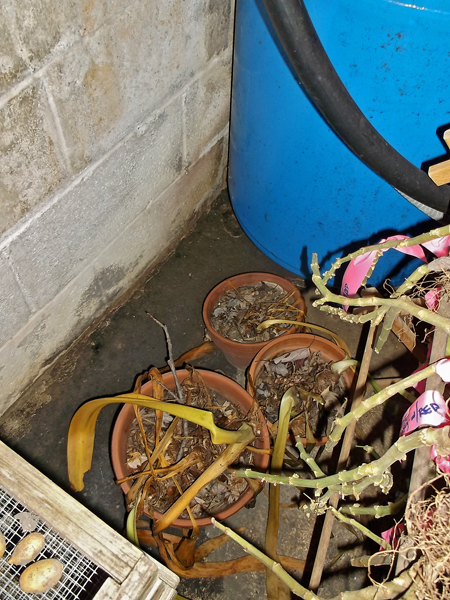
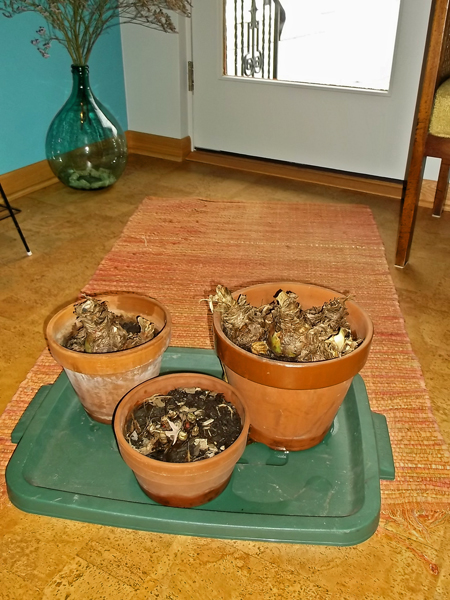
Pots of amaryllis bulbs that bloomed last March, keeping company with potatoes, canna tubers, calla lily corms, and bare root geraniums in a cold windowless room in my basement.

Six to eight weeks before you want them to bloom again, bring the plants into the sunlight and water them well.  Pull or cut off any old leaves.  Do not water again, until growth appears and/or the soil is dry to the touch.

7082

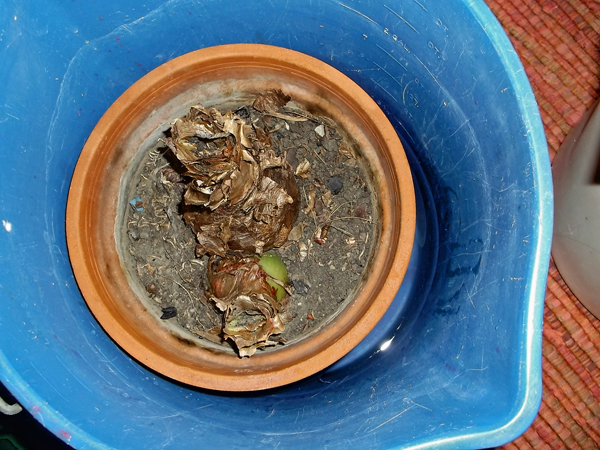
Pots of amaryllis setting in buckets of water until the surface of the soil is moist to the touch, the pots are then removed from the buckets and set in a sunny window

7083

Plants just coming out of winter storage and set in a bucket of water until soil surface is moist – approximately four hours, then removed from bucket

Then the waiting game begins:

7096

In just six weeks, these pots will be in full bloom.

4471

One year, in 2009, I forgot about the amaryllis in my basement until May.  No water, no sunlight for six months.  I brought them upstairs, watered them, and they couldn’t have been happier.

Share Button

Consilience and Concinnity, A Few Thoughts by Dr. Gerould Wilhelm

Jerry Wilhelm Aug 2011 Calumet

Dr. Jerry Wilhelm at the Thismia hunt, August 2011, Wolf Lake

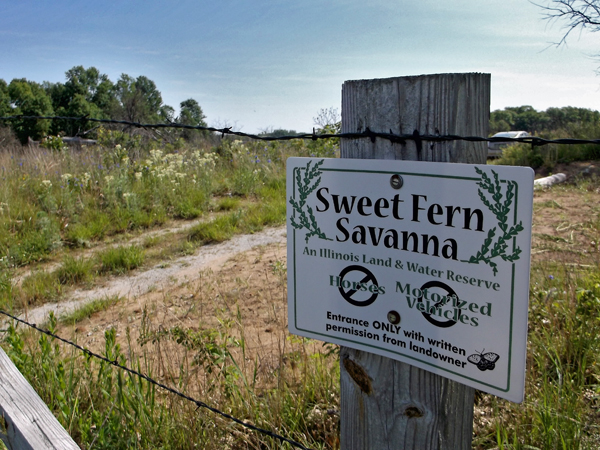
I first met Dr. Jerry Wilhelm in Hopkins Park, Illinois, on the property of my good friend Dr. Marianne Hahn in July of 2000.  I was part of a small group of about a half dozen people with the goal of botanizing this forgotten corner of Kankakee County.  Marianne has been restoring Sweet Fern, the name of her sandy Black Oak Savanna, since 1998, when she purchased her first three contiguous plots of land.  The 100+ acres have since been dedicated as an Illinois Land and Water Reserve.

0290

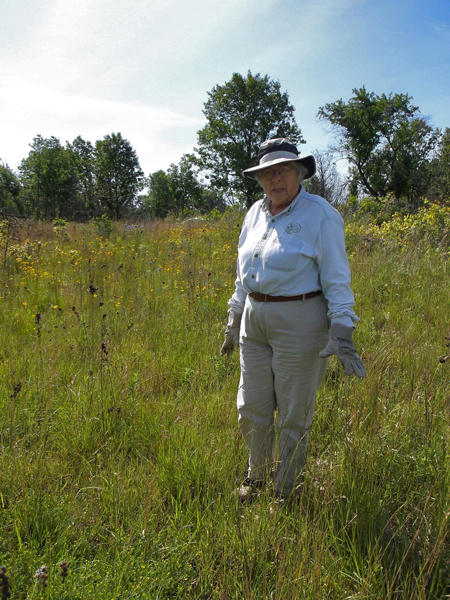
Marianne Hahn 2013

Dr. Marianne Hahn, retired microbiologist, at Sweet Fern

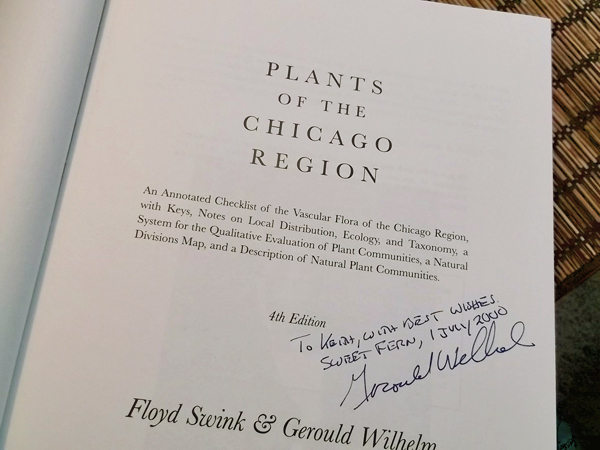
Fourteen years later, that day is a bit of a blur and I took no photos to record the event, but one thing I remember of that midsummer’s day, other than being the one chosen of lug the five pound copy of Plants of the Chicago Region, was Jerry’s excitement of walking through a very large colony of Polygonum Careyi, Carey’s Heartsease, a fuzzy stemmed member of the buckwheat family.  I can’t say that I felt the same excitement about the five foot tall plant, at my 5’8” frame, it was a struggle to walk through, and I was glad to get out of it, but I am not a renowned botanist and respected authority on Midwest native plants.  No I am not.  Nor am I the co-author of Plants of the Chicago Region, Jerry, however is.  He along with the late Floyd Swink compiled the 4th edition, published in 1994 by the Indiana Academy of Science.   

7071

Dr. Wilhelm signed my copy of his book at the end of the day

7072

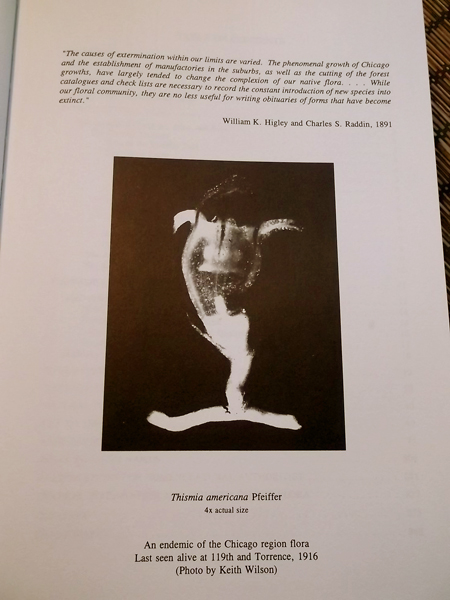
The front piece in “Plants of the Chicago Region” showing a photo of Thismia

Eleven years later, our paths crossed again.  This time it was in the Calumet Region of Chicago, Chicago’s Southeast Side.  To celebrate twenty years of conservation in the area, a Thismia hunt was held, a veritable Who’s Who in natural areas conservation attended the event.  Several groups were formed and sent out to scour different local areas, my group went to Miller Woods, near Lake Michigan in Indiana.  It was great fun.  Thismia, not seen in the Chicagoland area in nearly one hundred years, was not found that day either.

7077

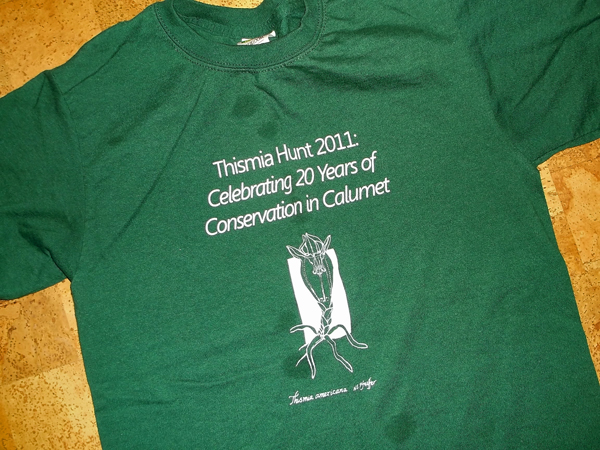
All participants received a T-shirt during the event

7076

The sponsors of the event

3007

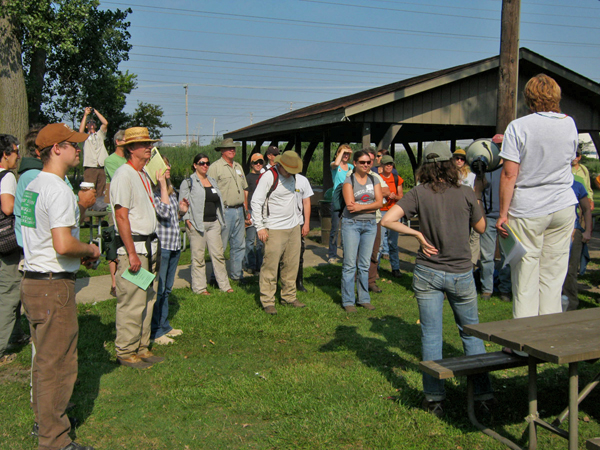
Stephen Packard, in the straw hat, looking on as Linda Masters speaks to the group at the Thismia hunt

Last month, I, along with two of my friends, had the pleasure of sitting through a presentation given by Dr. Wilhelm at Independence Grove, in Libertyville, Illinois.  The host of the presentation was the Upper Des Plains River Ecosystem Partnership, or UDPREP, a group whose mission is “to preserve, protect, and enhance the Upper Des Plaines River Watershed through stakeholder education, collaboration, and technical assistance.”  With that mission in mind, Wilhelm spoke primarily on the importance of soil moisture, and the role it plays in maintaining a healthy ecosystem.

Jerry started out by equating our role in the natural environment to that of a pilot at the helm of a plane; he recalled what his mother would remind him, when she felt he was going astray as a boy, namely, that we must learn the rules, and abide by them, if we don’t, we are airplane pilots that are “losing air speed, altitude, and experience.” 

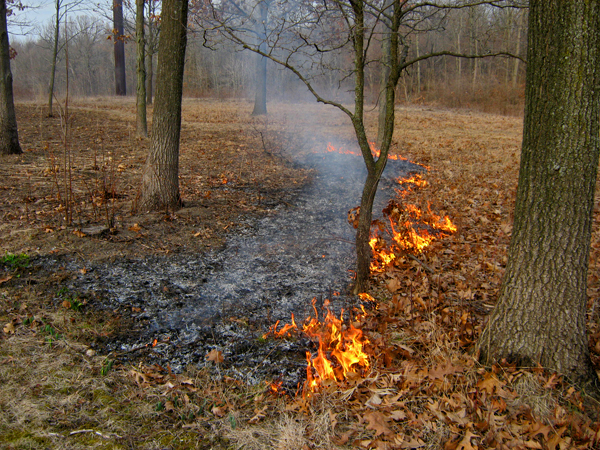
By burning woodlands and grasslands, as well as collecting wood for fuel, American Indians he said, historically, kept these areas open and full of sunlight thus playing a key role in keeping Midwestern landscapes in consilience, each separate element properly functioning so that other elements can function properly as well, as in a piece of mechanical equipment, a typewriter with all of its keys.  The result of a properly functioning ecosystem is concinnity – harmony and beauty.  As 21st century stewards of the earth, we need to know the rules and abide by them, or, as Wilhelm reminds us, we are headed for a rough landing.

9854

An open woodland, kept healthy with a seasonal burn, Crete, IL, 2013

“Annual autumnal burns are most healthy for biodiversity,” and he goes on to mention that they promote healthy populations of our native bees.  If too much duff builds up, the burns are too hot, and has the opposite effect of biodiversity.  In addition, annual burns, according to Wilhelm, keep organic matter high in the soil, thus reducing surface runoff during rain events, increasing available soil moisture to plants.

But soil moisture from rainfall is only one important source of water that is utilized by plants.  He briefly noted that condensation and respiration are two other important sources of water – “production goes down 50% if plants don’t get morning dew.”  As far as respiration as a source of water, as anyone who has spent a summer detasseling corn knows, the humidity inside a cornfield is much higher than outside the rows (this author’s personal observation.)

He went on to say that unburned, unmanaged woods result in a reduction of sunlight (less than 100 foot candles) hitting the ground layer, over time, as organic matter is lost from the soil, it is not replaced, there is no equilibrium as would be the case in a healthy system with more sunlight.  No annual burns = no grass layer = no organic matter being replenished by the roots of these lost grasses and associated forbs (wildflowers) due to the increased shade in unmanaged woodlands.  Grass roots die off, he mentioned, every three years, adding organic matter deep into the soil.  The loss of this regenerative process results in rainfall that runs off the bare surface of the soil, causing erosion and exposing fibrous tree roots, rather than penetrating deep into the lower soil layers.

“Corn and soybean plants do not add enough organic matter to the soil to keep up with what is lost due to tillage.”  Wilhelm mentioned that land can be in CRP (Conservation Reserve Program, administered by the USDA) for ten years and add ten tons of organic matter per acre and after 90 days of tillage that organic matter is completely lost.  On average, he notes that, ours soils today contain less than 2% organic matter.

Organic matter in soil, according to Wilhelm, creates an important “interface” between “heaven and Earth” that is currently lost.  Some of the effects include:

·       Temperature regulation

Wilhelm mentioned that ant populations go down without thermoregulation, organic matter helps the ants regulate temperature for larvae.  He noted that healthy woods have 15 to 20 ant species, while unhealthy woods have less than 5 or 6 species, and those are mostly non-conservative species.

With less than 52% soil moisture, soil loses its connection to the thermal mass of the Earth below.

·       Reduces runoff

      Soils with higher levels of organic matter not only allow water to enter the soil, it holds that moisture and  makes it available to plant roots.

·       Reduces leaching of potassium in to streams

The lack of organic matter (which binds soil elements) allows phosphorus to leach through soils into water bodies, a cause of filamentous algae blooms.

·       Increases soil moisture balance

Organic matter holds a certain amount of water, making it available to plants, the remainder flows through the layers of soil, out through seeps and into rivers and other bodies of water.  These moist soils along rivers therefore had trees due to the available soil moisture, according to Wilhelm.

Dr. Wilhelm touched on a number of points in his nearly two hour discussion.   The overarching message, however, is that we all, by our actions, however seemingly small, determine how well the living environment all around us functions, or fails to function.  Commoditized agriculture, he points out, does not take into account “high internalized costs” and that native plants, important keys on the typewriter that is our environment, continue to decrease overall – “A plant must be part of a system to fulfill its function, remnant ecosystems must be preserved so that we can grow out from them.  We need to treat every drop of water where it falls, as a resource, not as something to get rid of – water is a blessing not a bane.  Currently, we are losing airspeed, altitude, and experience.”

Share Button