Early July Blooms in the Native Garden

0484

In early to Mid-July some of the more showy flowers come into bloom.  In early spring, the shorter plants, including the violets, Yellow Star Grass, Sand Phlox, and the woodland wildflowers, such as Great White Trillium, and Sharp Lobed Hepatica are blooming.  As the season progresses, it seems the plants that are in bloom are just a bit taller, on average, than the ones blooming just a few weeks before. 

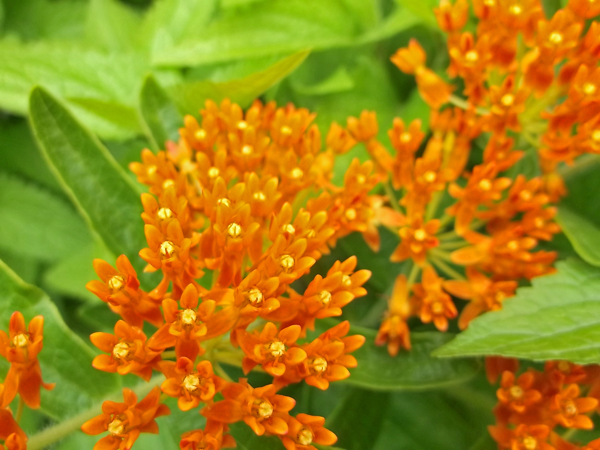
In a walk around my yard, I snapped some photos of the garden worthy native plants showing off a rainbow of colors, and one of the brightest is always Orange Milkweed (Asclepias tuberosa).  The intense orange flowers, are a magnet to butterflies, including the endangered Monarch butterfly, which rely on milkweeds to lay their eggs; Monarch caterpillars (larvae) will only eat the leaves of milkweed plants, without milkweed, there can be no Monarch butterflies.

0483

Orange Milkweed reaches a height and spread of approximately 18 inches, and blooms from the end of June until Mid-July.  The bright orange flowers can also appear in shades of yellow or reddish orange – uncommon.  In the photo above, the milkweed in planted in combination with Blue Mist Flower, which will be covered in blue fuzzy blooms come September (you read more about that plant <here>). Behind the milkweed is Pale Purple Coneflower (Echinacea pallida), which provides nectar to butterflies and seed for Goldfinches and other seed eating birds.

0482

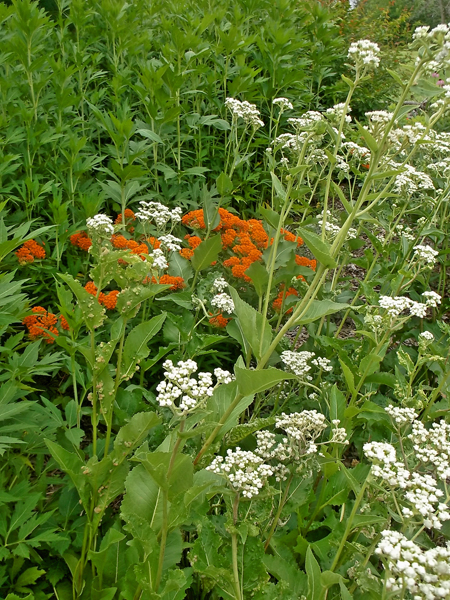
Here, Orange Milkweed is show in combination with Wild Quinine (Parthenium integrifolium)

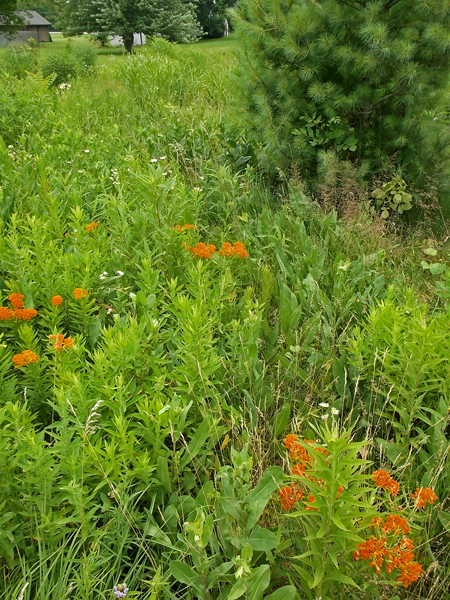
In the meadow, the Orange Milkweed is also quit showy, but will go dormant, as the asters and goldenrods begin to grow taller, as their later bloom time approaches.

0503

Also in the meadow, is a purple tinged Big Bluestem grass (Andropogon gerardii).  This one has a bit more color than is typical, ‘Red October’ is a cultivar grown in the nursery trade specifically for this purple accent and its red fall color – I planted a specimen of ‘Red October’ in another part of the garden and will compare the two specimens for ornamental qualities. The specimen below is approximately three feet across in width.

0525

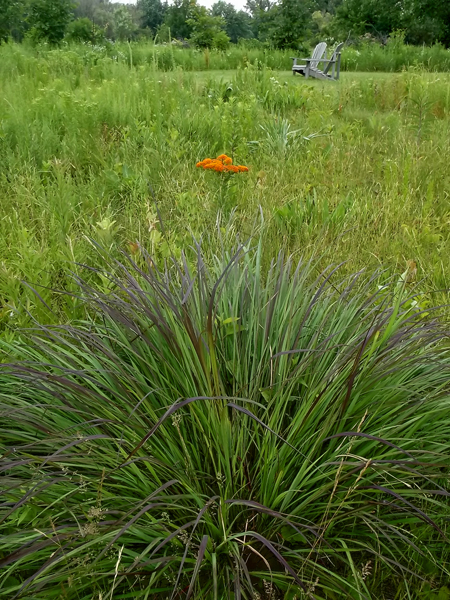
A great looking Big Bluestem grass in the backyard meadow

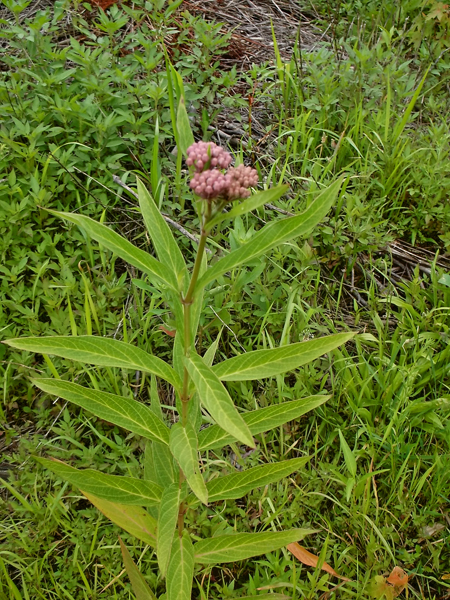
Another milkweed, just about to bloom, is the Red, or Swamp Milkweed (Asclepias incarnata):

0515

A closeup of the Red Milkweed blooms, just about to open

It’s another butterfly favorite, and as its common name indicates, can take wet soils, but will grow fine in typical well-drained garden soils, attaining heights of three to four feet on average.  Neither the Red or Orange Milkweeds spread aggressively, but may come up from seed if bare soil is near the parent plant.

0513

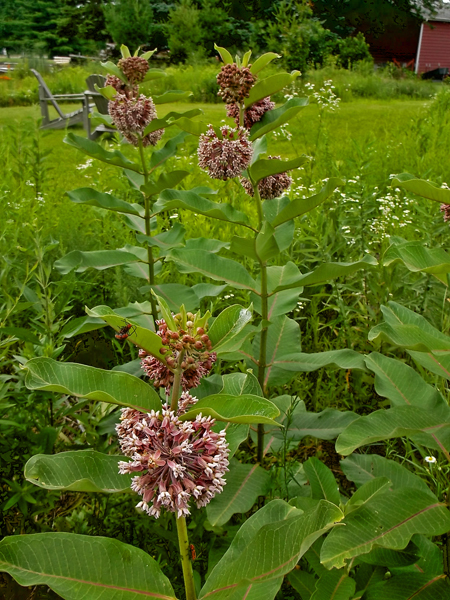
The Common Milkweed (Asclepias syriaca), however, while a great attractor of butterflies, will spread by randomly by wandering underground roots, so while the flowers are sweet smelling, it would be best to plant a less aggressive milkweed in a small garden – the milkweed shown below is in the meadow, and is quite happy – as are the Monarch Butterflies that laid their eggs on this plant this spring!

0498

One of the prairie shrubs blooming around the 4th of July is the purple flowered Lead Plant (Amorpha canescens), with accents of bright orange anthers.  This 18 inch, to three foot tall, sprawling shrub is attractive even when not in flower – the grey finely divided leaves are a nice contrast to nearby flowers.

0546

0548

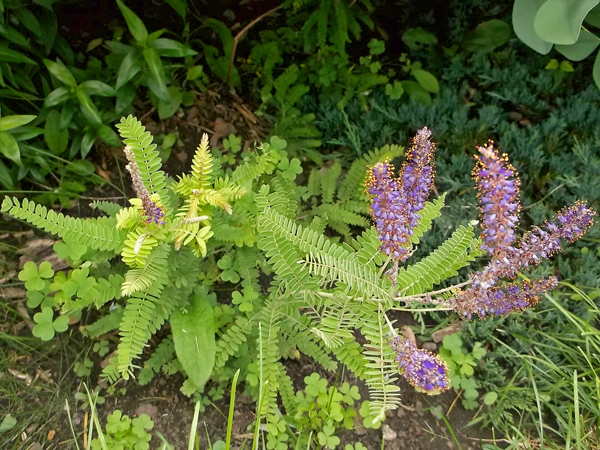
Leadplant shown in combination with Black-Eyed-Susan, Rudbeckia hirta.

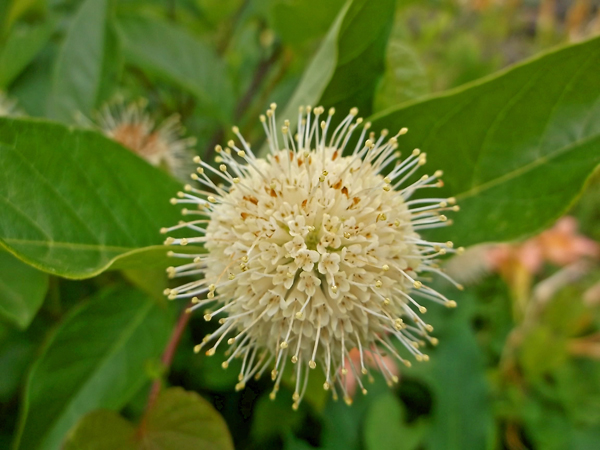
Buttonbush (Cephalanthus occidentalis), is another shrub bloom at this time of year, and in this case the flowers look like exploding fireworks – one inch around.  This plant is typically found in wet soils, but seems to do fine in the garden with morning sun – hot sun and dry soil is not what this plant wants.  attaining heights of six to eight feet plus, it can be pruned if necessary, but it would be best to plant it where is can grow to its full size.

0509

0508

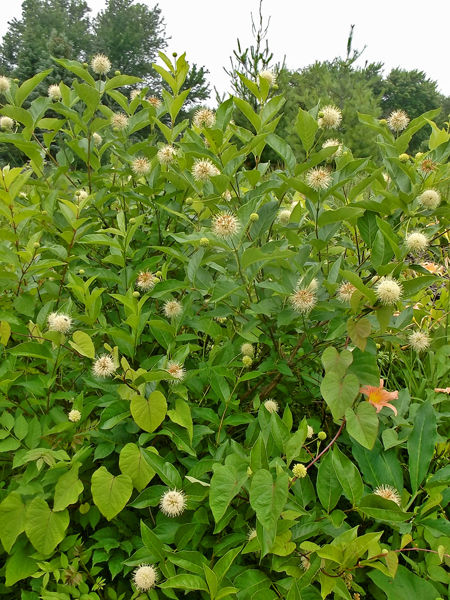
Buttonbush growing with the vining Wild Yam (Ipomoea pandurata) – soon to have three white morning glory like blooms.

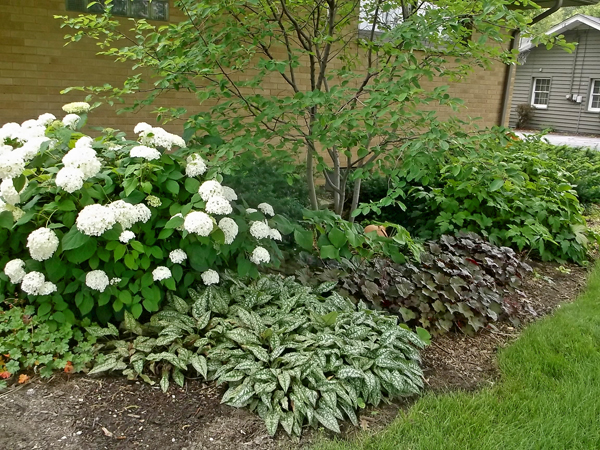
Native shrubs such as the naturally occurring cultivar ‘Annabelle’ Hydrangea and the multi-stemmed Serviceberry shrub, shown below, mix well with other garden plants such as (from left to right) ‘Biokovo’ Geranium, variegated Pulmonaria, ‘Palace Purple’ Coral Bells, and Pink flowered Japanese Anemone.  At the base of the Serviceberry tree/shrub is growing Jack-in-the-Pulpit – which will have showy red fruit at the end to summer.

0537

The Illinois Rose (Rosa setigera) is a rambler and needs a trellis to grow on if planted in a small garden.  It can be cut back to the ground in spring, as the one below is, to keep it managable.  It’s quite nice when in bloom, has nice red/orange/yellow fall color, and its fruit (hips) are a valuable food source for over wintering birds.

0507

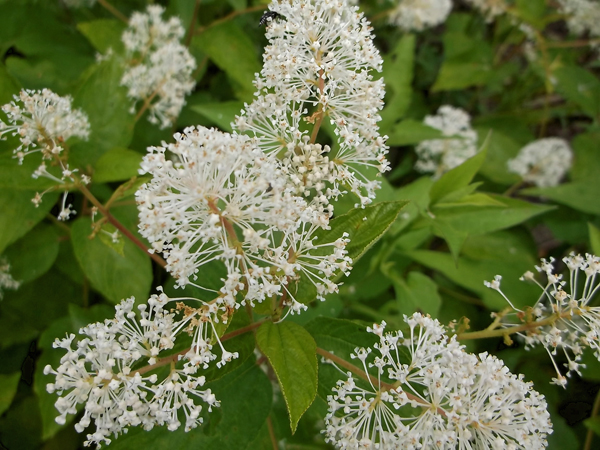
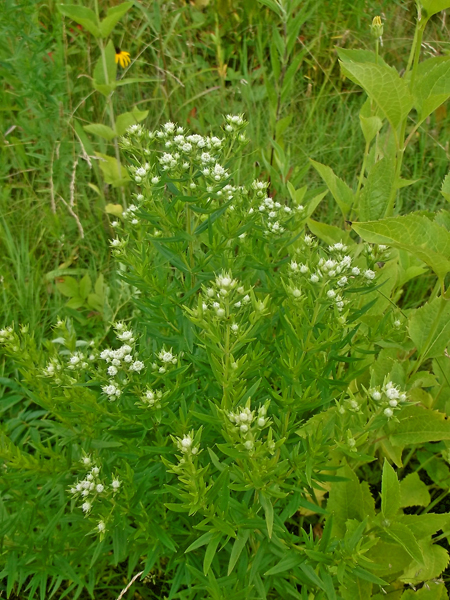
New Jersey Tea (Ceanonthus americanus), is a low shrub, growing to a maximum height of about three feet high and wide.  In July it is covered in fuzzy, two inch long blooms.  Hummingbirds come by to pick off the pollinated insects, rather than for its nectar.  New Jersey Tea does not have great fall color, so its snow white blooms in July are what give this plant its ornamental interest.  This woody plant can also be cut back to the ground during its winter dormancy to keep its growth more compact, as the plant shown is, every March.

0489

0490

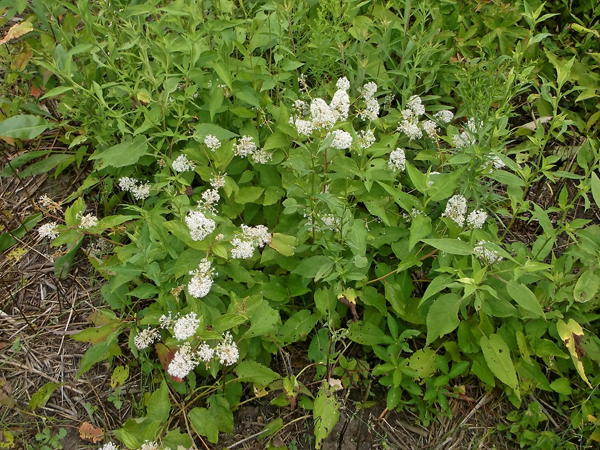
New Jersey Tea growing in a meadow setting

On the other hand, Smooth Sumac (Rhus glabra) has great fall color – mostly bright red, and its pinnately divided leaves inspired many a Frank Lloyd Wright window panel.  Sprouts coming up from the roots will need to be kept cut back in June, but it is otherwise carefree, attaining heights of eight to twelve feet tall and equally wide.

0494

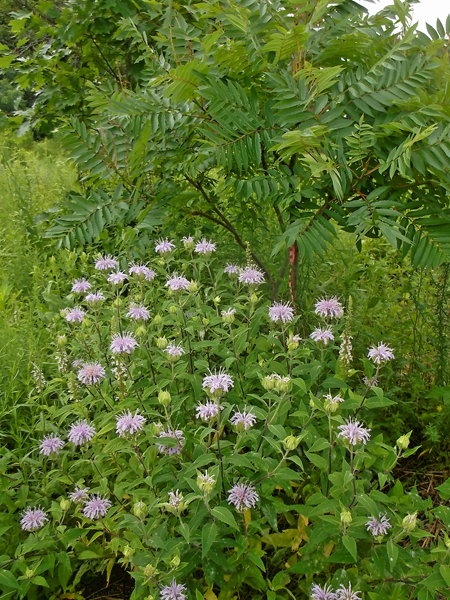
Smooth Sumac growing with Beebalm (Monarda fistulosa), another great butterfly plant, in the foreground.

Mountain Mint (Pynanthemum) is also in flower, not a true mint (mentha) it does not spread wildly by its roots, it does however have a pleasant wintergreen scent to its leaves – very strong when crushed.  In the herb garden, I cut it back by half at the end of June to keep it shorter (16 inches), it can get two to three feet tall.

0522

The flowers of Mountain Mint attract many pollinators to the garden.


0521

Mountain Mint just coming into bloom

The Wood Sage (Teucrium canadense), also planted in the meadow is looking great.  Growing in somewhat drier ground than it might prefer in the wild, the plants are only about four feet tall – topped by masses of spire shaped lavender flowers.  A good plant for larger gardens that can take its tendency to slowly spread.

0496

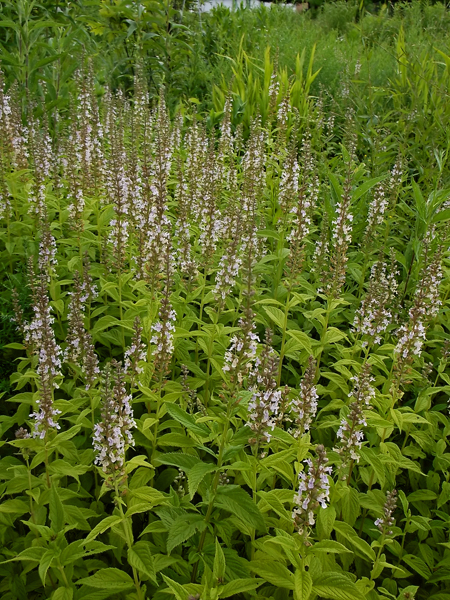
Wood Sage, or Germander, is commonly found in moist/wet meadows, but can be grown in average garden soil.

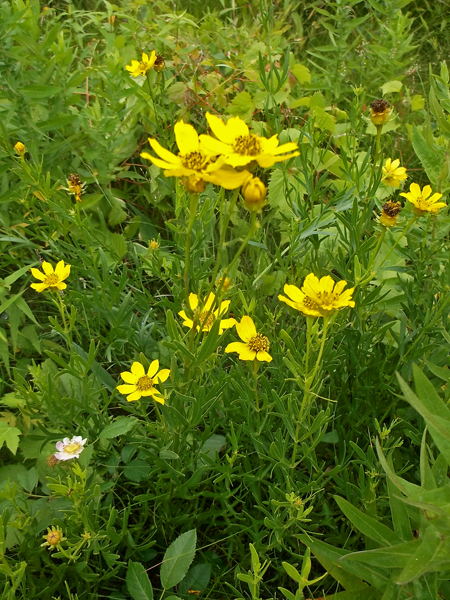
Prairie Coreopsis (C. palmata), is an attractive plant for the garden.  Growing to about three feet in height, it would make a good flower for the rear of a planting, with shorter plants in front.  As with all the coreopsis, the Goldfinches love the seeds that the plants provide.  The shorter Sand Coreopsis (C. lanceolata) bloomed earlier, and the Tall Coreopsis (C. tripteris) will bloom in a few weeks time.

0505

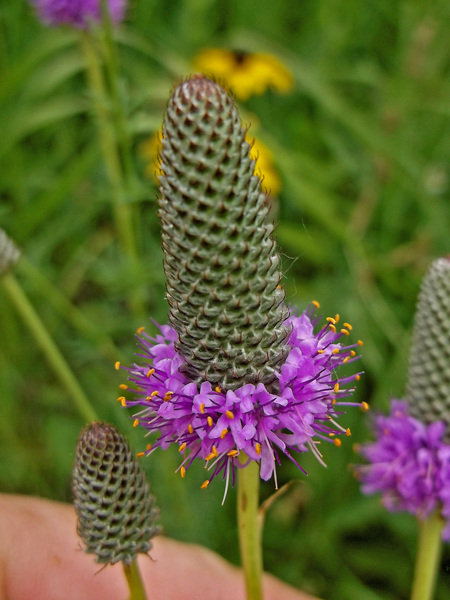
Finally, Purple Prairie Clover (Dalea purpurea, Petalostemum purpureum)) is a real show stopper.  The bright purple/pink blooms flower in rings, starting at the base of the flower structure, opposite that of liatris, which blooms from the top down.  Forming nice bushy eighteen inch to two foot tall plants, Purple Prairie Clover is a great addition to any garden.

0500

hhh

0499

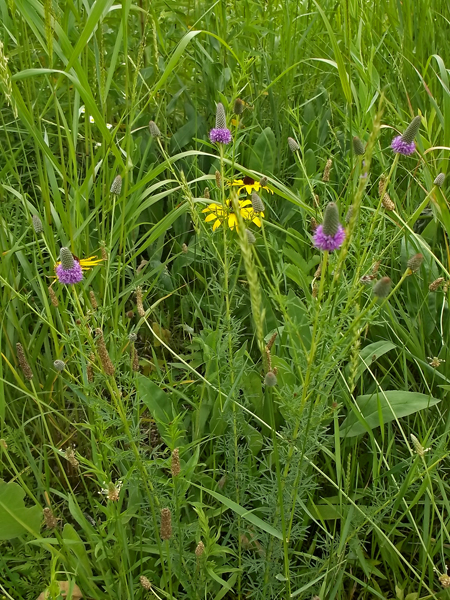
While this photo of Purple Prairie Clover was taken in a backyard meadow setting, it looks great in a more formal planting as well.

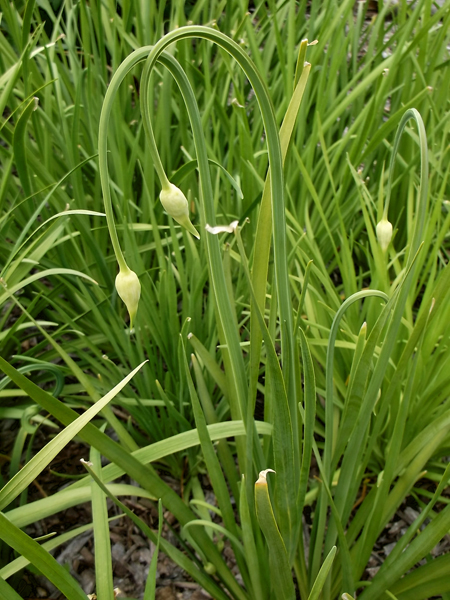
Finally on my backyard walk, I noticed the aptly named Nodding Onion (Allium cernuum) was just starting to set out its flower buds.   Its 1.25 inch round puffs of pink bloom will be taking center stage soon.  As the buds begin to open, the stems will have straightened out, and the flowers will rise at the top of eighteen inch tall wiry stems.

0485

Share Button

Potato Planting Time

8512

After being stored in a windowless room in my basement all winter, the potatoes were brought out in to the sunlight to be planted.   I grow seven kinds of potatoes: Kennebec, Yukon Gold, Red Norland, Russian Fingerling, Adirondack Red, Adirondack Blue, and Viking Purple. 

·        Kennebec, Late season, good winter keeper, large to very large tubers, tan skin, white flesh, developed in Maine in the 1940’s, released to the public in 1948. Good boiled, mashed, or baked.

 ·        Yukon Gold, Early to Mid-season, good winter keeper, medium tubers, tan skin, bright yellow flesh, developed in the 1960’s in Ontario, Canada, release to public in 1980.  Good for boiling or baking, as well as frying.

·       Red Norland, Early season, poor winter keeper, medium tubers, red skin, cream colored flesh, developed in North Dakota in the 1950’s, good boiling potato and often harvested mid-summer as a “new potato.”

·       Russian Fingerling (aka. Russian Banana), Mid to Late-season, fair winter keeper, elongated small tubers, tan skin, yellow flesh, developed in the Baltics, good boiling potato, roasted, or pan fried.

·       Adirondack Red, Early to Mid-season, poor winter keeper, small/medium tubers, red skin, pink flesh, high in anti-oxidants, Developed at Cornell University in New York State, released to the public in 2004, good roasted, mashed, pan fried.

·       Adirondack Blue, Mid-season, poor winter keeper, small/medium tubers, purple skin, deep purple flesh, high in antioxidants, Developed at Cornell University in New York State, released to the public in 2003, good mashed. roasted, or boiled.

·      Viking Purple, Mid to Late-season, good winter keeper, large tubers, purple/rose skin with pure white flesh, good baked, mashed, or fried.


Traditionally, many folks used Good Friday to mark the day for potato planting, and since Easter always falls on the Sunday following the first full moon after the spring equinox, that day is also a “planting by the stars” tradition.  In any event, potatoes are very cold hardy, and as long as the soil can be worked, and temperatures are on the rise, potatoes can be planted. 

Last year, I tried the straw method, a la Ruth Stout.  Ruth Stout was an East Coast gardener who wrote a few books about her “no-work” gardening methods.  Ruth would lay her seed potatoes on the ground, then throw straw on top of them – no digging, no work.  When I tried that method, all I managed to harvest was a bunch of slug eaten tubers, most not fit to eat.  I was also encouraged to try the straw method when I read about it in my old Farmer’s Encyclopedia from the late 1800’s – the excerpt is shown below:

8555a

8553

This year I’ve gone back to a more traditional method.  Many books talk about digging a trench and pushing the soil to one side, then as the potatoes grow, push the soil back around the plants, and hilling the soil up around the plants – which the old farmer’s encyclopedia advised against – who to believe?  The trench method may work fine, if you have the room – these same books want the gardener to space the seed potatoes 18 inches apart, in rows 36 inches apart, my garden is not that big.  I simply dug down about six inches, put down a potato tuber, then slightly covered the potato.  When it starts growing, I’ll push the rest of the soil back over the tuber.   Other than mulching with some straw to shield any potatoes forming near the soil surface from the sun, and turning green (green=solanine=toxin=inedible potato.)

8511

The tubers are spaced about a foot apart

I laid out my potatoes with approximately a one foot spacing, once I determined that my layout would work, I dug my hole and placed in a seed potato (seed potato = an untreated and disease-free tuber, used to grow a potato plant – super market spuds are treated to retard growth, an may not grow, if planted.)

8514

One tuber is placed in the bottom of each hole then lightly covered with soil

8521

The potato bed after planting

Vegetable Seed Update

A week ago vegetable seeds were planted, both inside and out, you can read about that here.  Of the carrots, lettuce, and beet seeds that were planted outside, so far, only the lettuce is making an appearance.  Meanwhile, inside, the tomato, pepper, ground cherry, parsley, and broccoli seeds are all up in just a weeks time. Bottom heat certainly helps.

8335

The tomato and broccoli seedlings were thinned to a spacing of about an inch and a half, or so.  Scissors were used to clip off the unwanted seedlings rather than pulling, since pulling out the unwanted plants may disturb the roots of the other plants.

8346

Thinning by clipping

8347

The bottom row of tomatoes has just been thinned, the upper two rows are next

8349

The appearance after thinning. The plastic wrap still covered the unsprouted parsley – the cover was removed today, as they have now come up.

  Over the next few weeks as daytime temps get into the 60’s and 70’s the flats of vegetable seedlings will start to spend some of their time outside – at first in a wind and sun protected area and for less than an hour, then each day the time will be extended and more exposure to the sun will be possible as the plants “harden off.”

Share Button

In the Vegetable Garden: Early April Seeding


8118 It’s April in the Chicago area, and it’s time to stop dreaming about getting outside and scratching around in the vegetable garden and start doing some planting!  While there are plenty of vegetables that can be sown directly into the cool spring soil, I generally have a somewhat limited pallet and they include carrots, beets, lettuce, sometimes kale, spinach, and other greens.  I’ll also plant onion sets, if I think to buy some, but usually rely on my shallots to carry me through – and those were planted last fall.  Also in the next few days, I’ll get my potatoes planted.  It’s starting to get busy around here.

8235 As a kid growing up in the 1970’s, one of the shows I’d watch religiously was Jim Crockett’s Victory Garden on PBS Public Television, running from 1975 until 2007.  Jim had a no-nonsense approach to his garden instruction – he knew what he was about and he told it like it was .. clearly and enjoyably.  It was like having a grandfather in the garden, showing you what to do and what to look out for.  The show had many hosts after his death in 1979, but the show was never as good as when Jim was there.  Thankfully, Jim wrote “Crockett’s Victory Garden”, published in 1977.  The book is invaluable to anyone wanting to grow vegetables in their backyard.  Each chapter in the book outlines the garden activities for a particular month ..if it’s April, it’s time to get the potatoes in the ground, plant carrots, plant out that apple tree, etc.  I still remember buying my copy in the bookstore more than 35 years ago.

8233 In the book, Jim included instructions on how to make a planting board.  This year, I finally decided to make one for myself, and it’s pretty useful – surprise!  My planting beds are 46 inches wide, so I made mine to fit, rather than the specified 48″ – I shorted my spacing of notches to 5.75″ from the 6″ in the book to account for this shorter length.  I used the planting board the same day it was made a few days ago, when I planted lettuce, carrot, and beet seeds in my vegetable garden. 

To make my planting board, I used some wood that I had pulled from a trash bin and had lying around the basement, a 1×4 piece of lumber is what is needed:

8114

This piece of scrap wood, destined for the landfill, came in handy

8116

The board was cut to length and marked every six inches where the notches would be cut out

8119

The finished product, ready to go into service for many years. I only question is: “Why did I wait so long to make one?”

8122

The edge of the board was cut at an angle, allowing it to be used to make furrows for planting seeds

8113 The raised beds of my garden allow the soil to drain well and warm up sooner in the spring, than if I didn’t have raised beds – the poorly drained soil in this part of my yard necessitated the raised beds, so they are not just a luxury.  Last fall, I prepared one of the raised beds for planting out garlic cloves.  The middle of the bed was left vacant for early spring planting of other crops.

8120The soil was raked smooth, then the planting board was used to make shallow 1/2 inch deep furrows, spaced about ten inches apart, for the seeds.

8124

Pinching a crease in the seed packet allows for more control when shaking out the seeds.

The process went quickly and the angled edge of the planting board worked well in making the furrows consistent.  Trying to avoid too much thinning in a few weeks, the seeds were spaced about 1.5 inches apart.  From each seed packet, I was able to plant four, 4ft rows.  The cost of each seed packet was five cents – yes a nickel each, thanks to a sale at The Home Depot of 20 packs of seed for a dollar.  After the seeds were planted, a steel garden rake was used to tamp the soil down and then the plot was watered and will be watered every day, until the seeds come up, and as necessary after that.

8125

Tamping the soil down around the seeds help them to make good contact with soil moisture – if the soil is allowed to dry out before the seeds spout – they may never appear.

Indoor Seeding

8128A few vegetables need warm soil (and a long season) to sprout and ultimately produce fruit.  If planted outside in April, the seeds would sulk until soil temperatures reached the 70° F mark, by then, it would be too late to get a harvest from the plants.  For that reason, I start my tomatoes and peppers indoors with bottom heat.  I also planted some parsley, ground cherry, and broccoli this year, since I had room for these as well.

8127For bottom heat, I use a 14″ by 36″ rubber heat mat made by Bird-x of Chicago.  The mat keeps the soil at about 70° F, perfect for starting seeds.  Once the seeds have sprouted, I’ll unplug the heat mat.  The heat mat is set on rigid foam insulation so that more of the heat goes into the soil, rather than into the room.

8136I used a commercial potting mix specifically for vegetables and outdoor flowers to fill my flats primarily because it’s weed and disease free – very important when starting tender seedlings.  A mix of compost, peat moss, and perlite could be used as well, if it is pasteurized at 180° for about a half an hour in an oven or outdoor grill.

8129

A pencil makes for a handy tool when creating furrows in the seed flats.

I used a wooden seed flat, because the heat transfer is better, the soil stays moister longer, I can get more plants in small area, and I find it quicker to plant than plastic cell flats.  But since I earlier started some Spanish peanuts in a plastic tray, I also planted some tomatoes seeds in the unused portion as well.

8134

Everything is labeled as to species and date of planting, These labels follow the plants later in the season as they get planted out in the garden.  After watering everything thoroughly, plastic wrap is laid on top of the soil to retain moisture in the soil until the seeds sprout.  Once the seeds come up, the plastic wrap is removed, and the seedlings are watered as needed. 

8135

The moist soil is covered with plastic wrap until the seeds sprout, when it is then removed.

In the past, I have tried to grow seedlings under artificial lighting (florescent tubes), without much success.  No matter how close the lights are to the plants or how long I leave them on (using a timer), the plants always got spindly and mostly fell over and died.  This year, the east facing window will have to do, and as it gets warmer outside, I will slowly begin to set out the trays where they can get more light.

Share Button